In this article
Activating the Device Unit on an on premise (offline) POS
Point of Sale (POS)
For Point Of Sales that are running on a different company or instance from the Head Office, the following must be ensured:
If the Point of Sale is on SaaS, then the License Manager Setup should be activated the same way as in the Head Office, as described in Activate License.
If the Point of Sale is on prem, the License Manager web services must connect to the Head Office where the License Manager key is activated. This can be achieved the same way as for other web services:
A new setup added to the POS Functionality Card under the Web Services section, to specifically setup the Distribution Location for the License Manager.

Alternatively, the general Web Servers setup from the POS Functionality Profile Card will be used.

Note: Make sure that the respective License Manager web services (LMGetLicenseUnit and LMReleaseLicenseUnit) are published and subscribed.
Activating the Device Unit on an on premise (offline) POS
If the Point of Sale is on premises, the License Manager web services must connect to the Head Office where the License Manager key is activated. This can be achieved the same way as for other web services.
This guide explains, step by step, how to activate the Device Unit on an on premise (offline) POS referred to hereafter as the offline POS.
Some steps reference the Offline POS project for the Update Service, which uses Web Replication with Azure Storage to fetch master and setup data required to run the offline POS. The same steps apply when the offline POS connects to a Head Office running on-premises — in that case, the data normally injected by the Offline POS project (such as Retail Setup information and the data required to create the Retail User) can instead be populated manually, using a Scheduler job and Data Director, or using configuration packages.
Step 1 — Activate the license on Head Office
Activate the license on Head Office. See How to: Set Up License Manager.
In the Head Office company, make sure enough Device Units are available for the offline POS.
Step 2 — Set up the offline POS
Using the Update Service for this task is recommended. It offers a project that automates the installation of the offline POS, using Web Replication with Azure Storage to replicate setup and master data from Head Office in SaaS to the offline POS terminals. See the LS Central Implementation Guide for further information.
Step 3 — Prepare the Head Office company in SaaS
Before installing the offline POS, complete the required tasks on the Head Office company in SaaS. See Web Replication Using Azure Storage for the full list.
This includes publishing the POS web services, including the LMGetLicenseUnit and LMReleaseLicenseUnit web services.
A new setup was added to the POS Functionality Card under the Web Services section, to specifically setup the Distribution Location for the License Manager.
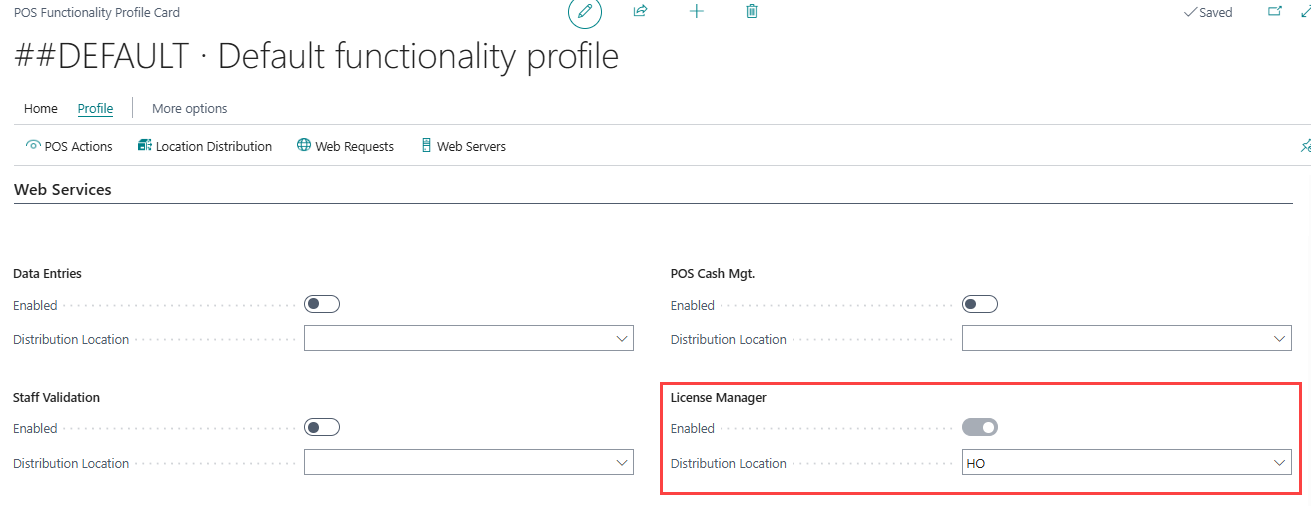
Alternatively, the general Web Servers setup from the POS Functionality Profile Card will be used.

Step 4 — Replicate data to Azure Storage
Once the Head Office preparation is complete, run the job to replicate POS, master, and setup data from Head Office to Azure Storage (named OFFLINE_POS_INIT if using the configuration packages provided with the Offline POS project). See Web Replication Using Azure Storage for more detail on this replication method and its required setup.
Step 5 — Install the offline POS
Using the Update Service to install the offline POS is recommended. See the installation steps.
Step 6 — Run the replication job on the offline POS
After completing the offline POS setup, open the Business Central client and run the AZSREPLUPDATE Scheduler job to pull the setup and master data down from Azure Storage.
Note: This Scheduler job is inserted automatically as part of the Offline POS project for the Update Service. If you are not using that project, the setup and master data can instead be populated manually — using a Scheduler job together with Data Director, or using configuration packages.
Once the job has run, the offline POS should have all the master and setup data it needs to operate.
Step 7 — Create a Retail User and assign the Device Unit
To assign the Device Unit to the POS, the POS must connect to Head Office — which requires a Retail User to be created first.
A prerequisite for a Retail User logging into the POS — so that the POS can trigger the required web service call to Head Office — is that the Retail User must be configured as a "Device Only User." This applies to offline POS installations as well as regular on-premises POS installations.
The Device card must also be populated. Refer to the following resources for detailed instructions:
Step 8 — Run the POS and verify the license call
Run the POS. This triggers the LMGetLicenseUnit call to Head Office.
You can verify this communication in the WS Request Log on the Web Service Setup page (Client Logs must be activated for these logs to be populated).

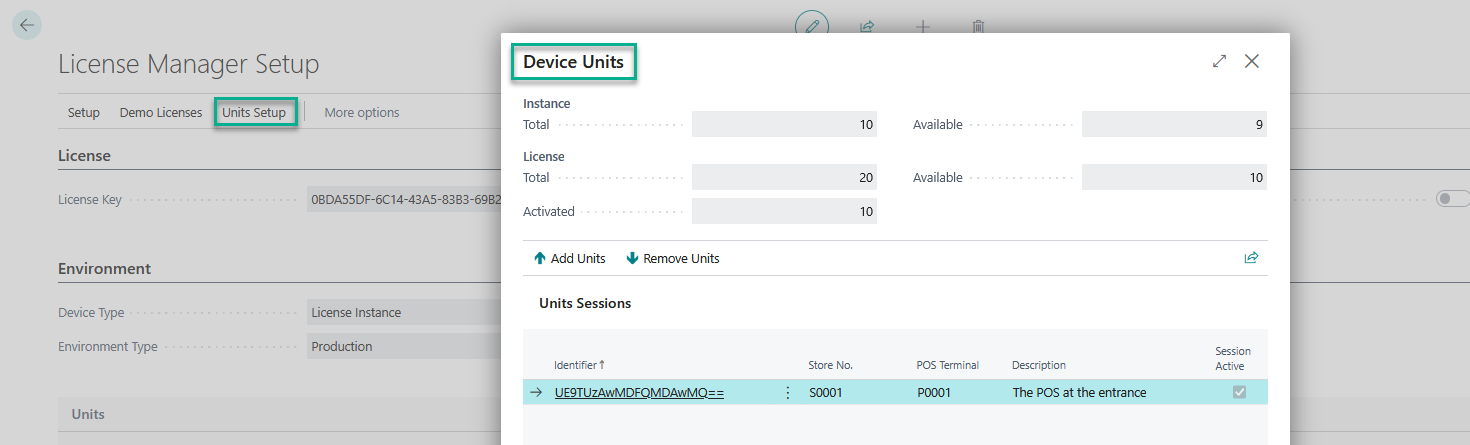
In the Head Office company, you can also verify that the POS has called Head Office from the License Manager Setup page.