In this article
Import and Apply SCO Configuration Package
Assign Self-Checkout Device Type
How to Configure an Item to Be Sold on SCO
Once NavUserPassword is set up, complete the following configuration steps in LS Central to prepare the environment for Self-Checkout Connector (SCO). Some of these steps are described in more detail in other topics.
Import and Apply SCO Configuration Package
You can request the latest configuration package from the Support channel to get a configuration setup in a quick and easy manner. The data in the package fits LS Central demo data and help you set up the SCO Connector on the LS Central side.
- Import the provided
*.rapidstartconfiguration package. - Apply the package to initialize SCO configuration settings.

You can request the latest configuration package from the Support channel to get a configuration setup.
Assign Hardware Profile
A Hardware Profile defines which hardware devices (such as EFT terminals, printers, scanners, and scales) are connected to the POS environment. SCO uses this profile to know which devices it should communicate with through Hardware Station.
For example:
- When completing a payment, SCO uses the Hardware Profile to know which EFT terminal to send the request to.
- When printing a receipt, SCO uses the Hardware Profile to determine which printer to use.
Assign a Hardware Profile in the following LS Central cards:
- Self-Checkout Connector
- POS Terminal
- Store
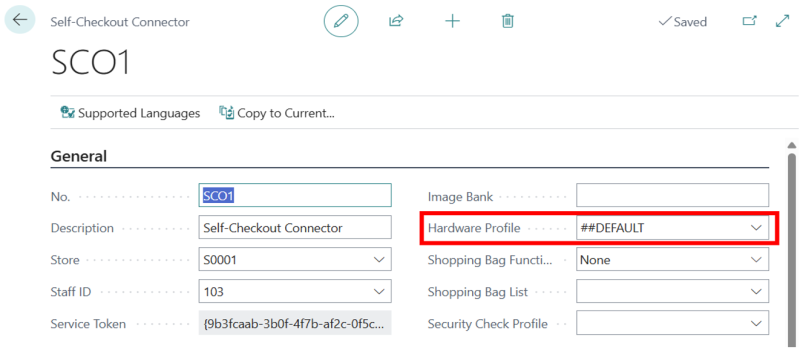
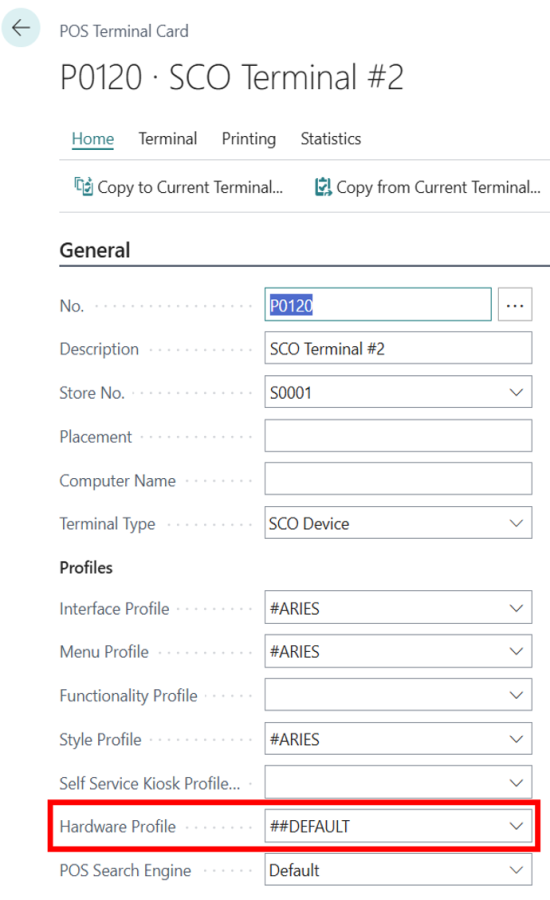
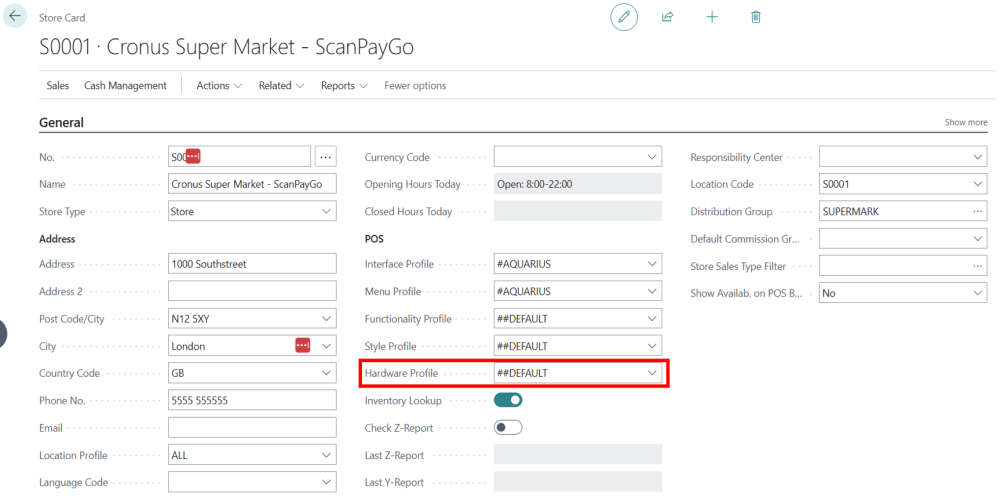
SCO first uses the Hardware Profile defined on the Self-Checkout Connector page. If none is defined there, it uses the Hardware Profile from the POS Terminal. If none is found there either, it falls back to the Hardware Profile defined on the Store.
For detailed setup instructions, see Hardware Station for LS Central topic.
Assign Self-Checkout Device Type
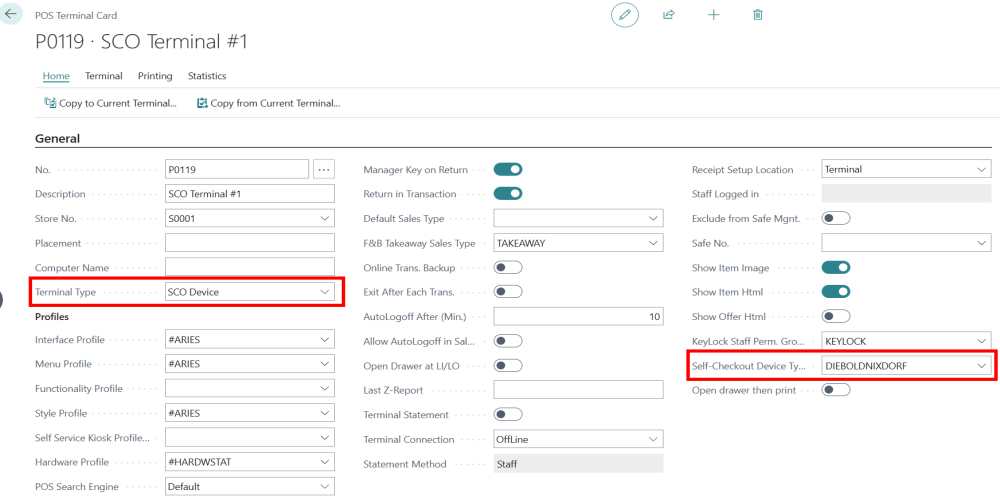
On the POS Terminal card, assign a Self-Checkout Device Type and set Terminal Type to SCO Device.
This step must be done for each POS Terminal that was added in the Self-Checkout Connector page. If you want a POS terminal to function as a Self-Checkout device, you must configure it this way.
In summary:
- Set Terminal Type = SCO Device.
- Assign a Self-Checkout Device Type (which defines the connection settings for the POS system).
For available device types and custom implementations, see Available Device Types and Custom Implementations.
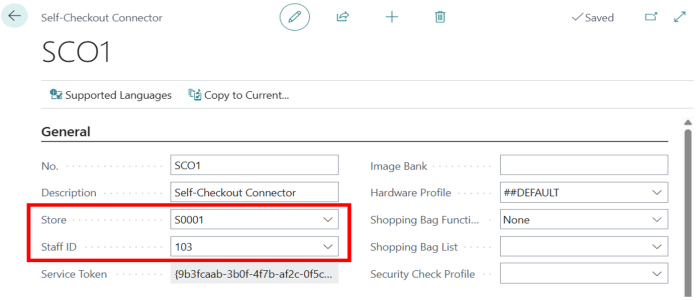
Configure Store and Staff
- On the Self-Checkout Connector card:
- Assign Store.
- Assign Staff ID.
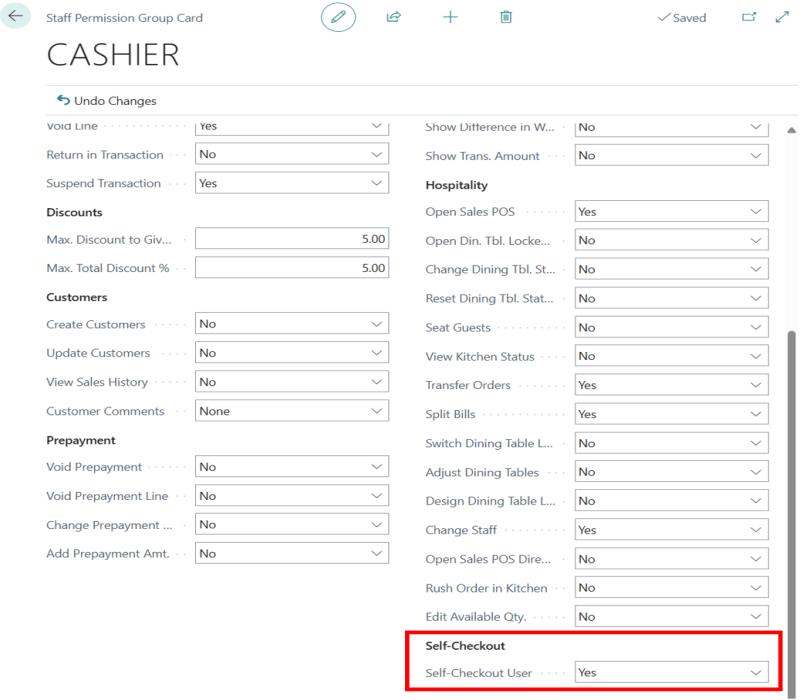
- On the Staff Permission Group card:
- Set Self-Checkout User to Yes for the assigned staff member.
Add Feature Flags
Add the following Feature Flags in the Self-Checkout Connector card:
DiscountText→DiscountAgeVerificationLimit→18,20
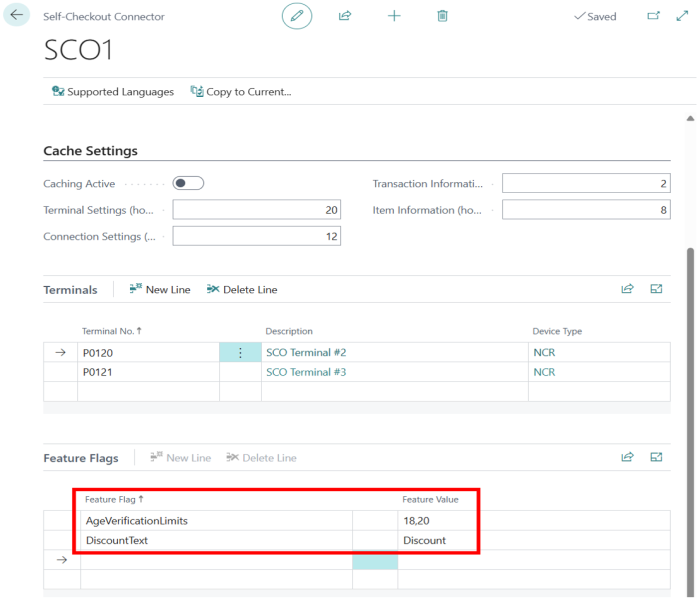
For a full list of supported feature flags, see Feature Flags for SCO Connector.
Setup Tender Type Mapping
Tender Type Mapping is required when the Tender Type IDs used in LS Central and the SCO Device do not match. If the IDs cannot be aligned in both systems, you must configure a Tender Type Mapping Profile so that the LS SCO Service can translate between them.
The mapping ensures that SCO can send the correct tender type ID to the POS SCO device during a transaction, and then map it back to the LS Central tender type once the payment has been finalized.
Example:
The POS SCO Device requires the tender type ID for card payments to be
bankingcard, but LS Central already uses a tender type with the unique
ID cards.
A Tender Type Mapping profile is needed so that SCO correctly handles this difference.
Note: If the Tender Type IDs are already the same in both LS Central and the SCO Device, mapping is not required.
Tender Type Mapping Profile Card
The Self-Checkout Tender Type Mapping Profile card contains the following fields:
- Tender Type Mapping Profile – Identifier of this mapping profile.
- Store No. – The store where this mapping applies.
- Mapping Tender Type – The tender type ID used in the SCO POS device.
- Tender Type – The tender type defined in LS Central.
Steps to Configure
- Create a Self-Checkout Tender Type Mapping Profile.
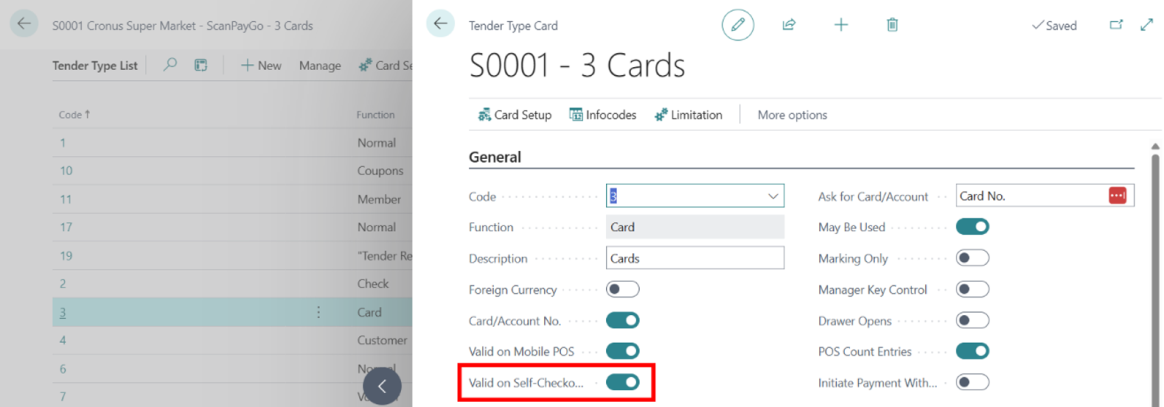
- Configure Tender Types:
- Navigate to: Store → Cash Management → Tender Types.
- Check the box: Valid on Self-Checkout POS.

How to Configure an Item to Be Sold on SCO
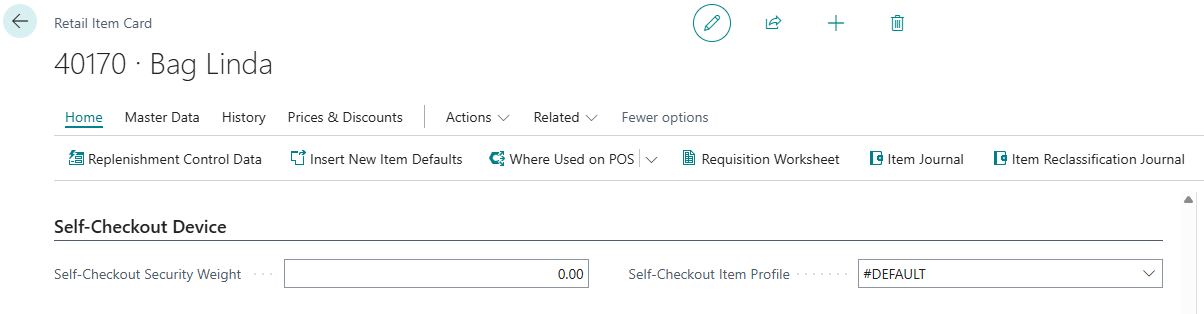
To make an item available for sale on Self-Checkout (SCO), it must be properly configured in the Retail Item card in LS Central (Business Central). The configuration ensures that the item can be validated at the SCO device and, if needed, associated with security or feature restrictions.
Retail Item Card Settings
- Self-Checkout Security Weight – Defines the expected weight of the item. When the customer scans and places the item on the security scale, SCO checks if the measured weight matches this value to prevent misuse.
- Self-Checkout Item Profile – Determines whether the item can be sold on SCO and applies additional rules or feature flags.
Self-Checkout Item Profile
An Item Profile is managed in its own card, where you can create reusable profiles and assign them to items. Each profile contains:
- Item Profile Code – Unique identifier for the profile.
- Description – A descriptive name for easy identification.
- Can be sold on Self-Checkout – Checkbox that must be enabled for the item to be eligible for SCO.
- Feature Flags – A table of optional feature flags applied to items with this profile.
Hierarchy Usage
You must create at least one SCO Item Profile with Can be sold on Self-Checkout selected. This profile should be applied as high up in the item hierarchy as possible to avoid configuring every item individually. The SCO Item Profile can be set at the following levels (from highest to lowest priority):
- Division – Applies to all items within the division.
- Retail Product Group – Applies to all items within the group.
- Item Category – Applies to all items within the category.
- Item – Applies to a single item.
SCO evaluates the hierarchy from the item itself upwards and uses the first SCO Item Profile it finds. This allows general rules to be set at a higher level (for example, Division) while applying exceptions at lower levels (that is, specific items or groups).
If specific restrictions are required, such as blocking certain items from being sold on SCO, assign a different SCO Item Profile with Can be sold on SCO unselected at the appropriate hierarchy level.
Feature Flags on Item Profiles
Feature Flags allow applying extra rules at item level. The Feature Flags table has three fields:
- Feature Flag – The name of the feature (for example, AgeLimit).
- Feature Value – The value for the feature (for example, 18).
- Feature Option (Device Type) – The device type where this rule applies (for example, DIEBOLDNIXDORF).
Example
For an alcoholic beverage item, you can assign an Item Profile with the following Feature Flag:
| Feature Flag | Feature Value | Feature Option (Device Type) |
|---|---|---|
| AgeLimit | 18 | DIEBOLDNIXDORF |
This configuration means the item can only be sold on a Diebold Nixdorf SCO device, and only if the customer is verified to be over 18.
Blocking an Item from Being Sold
If an item must not be sold on a POS or SCO, you can block it by assigning a Status Code in the Item Retail card:
- Open the Retail Item card.
- Click Related → Master Data → Groups and Links → Item Status.
- In the Item/Item Status Links page, fill in the Status Code field.
If the Status Code is set to BLSALE, the item is blocked for sale on a POS and is not available on SCO either.