In this article
Update Service Server must be hosted either on-premises or on a virtual machine in Azure.
Follow these steps to install the Update Service Server. If you already have an Update Service Server up and running, you can skip this step and jump directly to Step 2.
Run the Offline POS using Web Replication with Azure Storage - Installation preparation project installer as Administrator, and install the Update Service Server component. Click here to download the installer from the LS Retail Portal (requires login).
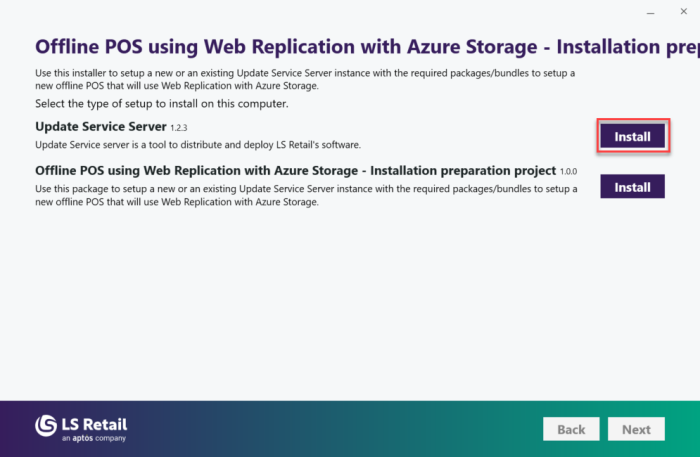
Update Service Server
Select Optional Components
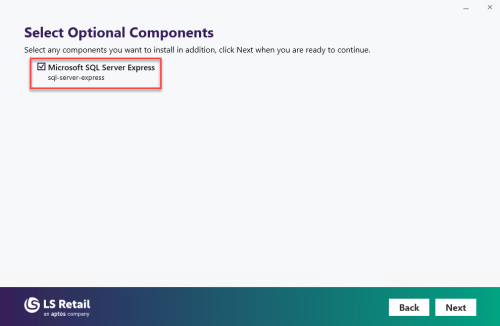
SQL Server Express is an optional component.
If the server does not have any SQL Server instance installed, or you are not going to use an SQL Server instance installed on a different server, you can choose to install a SQL Server Express instance.
Note: Update Service Server requires SQL Server - refer to the Server Requirements for prerequisite information.
Arguments
Microsoft SQL Server Express (only visible if installing SQL Server Express)
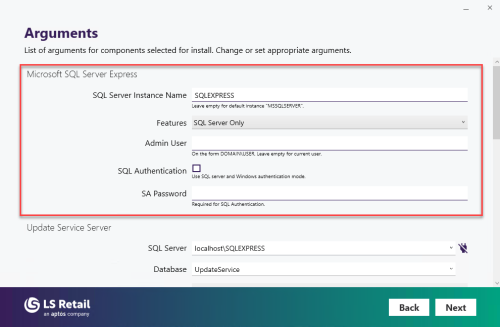
You will be presented with a set of fields to fill out:
- SQL Server Instance Name: Enter the SQL Server Instance Name. Should be filled in by default.
- Admin User: By default, leave this field empty and the current domain user logged in will be set as the SQL Server administrator. Enter a different domain user, if needed.
- SQL Authentication: Enable this field to enable SQL Server Mixed Authentication mode.
- SA Password: Enter the password for the SA user. Required if the SQL Authentication (SQL Server Mixed Authentication mode) is enabled.
Update Service Server
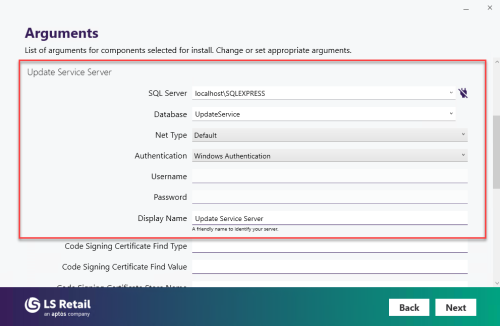
You will be presented with a set of fields to fill out. These fields will be used to connect the Update Service website in IIS to the Update Service database in the SQL Server.
- SQL Server: Enter the SQL Server name (and include the instance name, if it exists). Should be filled in by default.
- Database: Enter the name for the Update Service database. By default it is filled with UpdateService.
- Authentication: Select the authentication to be used to connect to the SQL Server:
- Windows Authentication - Windows Authentication mode will be used to connect to the SQL Server and to the Update Service database.
- Database Server Authentication - SQL Authentication mode will be used, so you need to fill the Username and Password fields.
- Username: Only applicable to Database Server Authentication.
- Password: Only applicable to Database Server Authentication.
- Display Name: Enter the name for the Update Service website created in IIS. By default , it is filled with Update Service Server.
Note: A connection string is created based on these fields, to allow the Update Service website to connect to the SQL Server. This information is saved in the appsettings.json file, in IIS (example: C:\inetpub\wwwroot\Update Service Server\appsettings.json)
Install completed
After the installation is successfully completed, run the Offline POS with Web Replication using Azure Storage installer again and proceed to the next package: Offline POS with Azure Replication Project.
Videos
Offline POS: Installing Update Service Server (1/3)