If you have set up version 2022.3 or 2031.1 of LS Insight, you can apply the changes in version 2023.2 by downloading the update package and running the script against your current LS Insight instance.
The update package includes a few changes in the Azure Data Factory and new rebranded report templates. You can read more about the updates in the release notes.
Note: The Azure Data Factory containing the ETL process pipelines will be replaced and some of the stored procedures in the DW database might be updated, so if you have made any customizations to the pipelines or stored procedures in the DW database, you should make sure that you have information about all those changes since they might be overwritten.
Tip: If you have a large number of customizations, we recommend that you set up a new LS Insight instance with new DW and ADF beside the older instance of LS Insight, and move your customizations between them before you start using the new instance.
Download update
As a part of the rebranding, it was decided to change the way partners and customers can download Analytics for LS Central. This change was primarily made so we can have a better idea who is using the product and be able to better cater to the needs of our customers.
To get the Analytics for LS Central update or product package for new versions of Analytics from LS Retail, you first need to request an Analytics license. The license is still free of charge and development licenses are available for partners. This also applies to customers and partners that already have LS Insight installations.
- Please contact the LS Retail License department through email or put in an Additional order request through the LS Retail Portal.
- Analytics for LS Central is included in the NAV and LS Central pricelists that are valid from April 2023, but you can send in requests before that time.
Once the License department has processed your request, you will receive a link to the request product package form where you can choose whether you download a new installation or update package.
When you have entered the relevant information to the form and submitted, you will receive an email with a download link to a zip file that includes everything you need.
Preparation
Before you run the Update script you need to disable the Scheduled Run trigger in the LS Insight instance you want to update. If you view the instructions on how to activate the trigger, you can follow those, but this time you set Activated to No and then apply and publish the changes.
Update LS Insight > Analytics for LS Central
- Open the update package folder you just downloaded, in VS Code.
- To open the whole folder in VS Code, you open it in File Explorer and then right-click in a white space, not a file, and select Open with Code.
- Open the UpdateAnalytics.ps1 script in VS Code, and run by clicking F5.
- The script will first ask if you have access to the file path to the parameter file (Parameters.json) that is located in the LS Insight project folder that was created when LS Insight was deployed (YYYYMMDDHHMM-MyProject).
- If you still have access to the project folder, you can reuse the parameters by answering Yes and providing the full path to the Parameters.json file.
- If the project folder has been removed or deleted, you just answer No and enter the parameters when prompted.
Note: You need to use the same parameters you supplied when you installed LS Insight. You can find the connection parameters and the names of your current SQL server, database, and Azure Data Factory in the Azure portal.
- The script then prompts for Azure subscription ID and login to Azure.
- Next, the script collects the parameters that have not been set, and validates connection parameters to LS Central and Analytics.
- The script now runs the updates.
- When the script has finished running, it displays a message.
Post update
You need to start the Scheduled run trigger again, and verify that it is still set to the time and timezone you want.
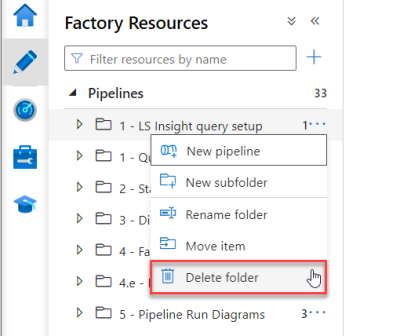
To clean up the Folders and pipelines after the name changes you can delete the top folder in the Azure Data Factory.
Note: Remember to publish after you have reactivated the trigger and deleted the folder.