In this article
Step 1: Create or Verify Self-Checkout Device Types
Step 2: Verify Default Feature Flags
Step 3: Configure the SCO Card
Step 4: Verify Hardware Profiles
Step 5: Testing Diebold Terminals
This topic explains how to configure the Self-Checkout Connector (SCO) to work with Diebold Nixdorf devices in Business Central, including SCO card, terminals, and Device Type setup.
Step 1: Create or Verify Self-Checkout Device Types
SCO terminals must be associated with a Self-Checkout Device Type that defines manufacturer, host, port, and Feature Flags.
- Open the Self-Checkout Device Type list in Business Central.
- Verify that there is a Device Type for each Diebold terminal to be used.
-
Each Device Type should include the following fields:
- Device Type – Unique code for the device type.
- Description – Descriptive name.
- Brand – Manufacturer (Diebold Nixdorf).
- Tender Type Mapping Profile – Optional, if tender type IDs differ.
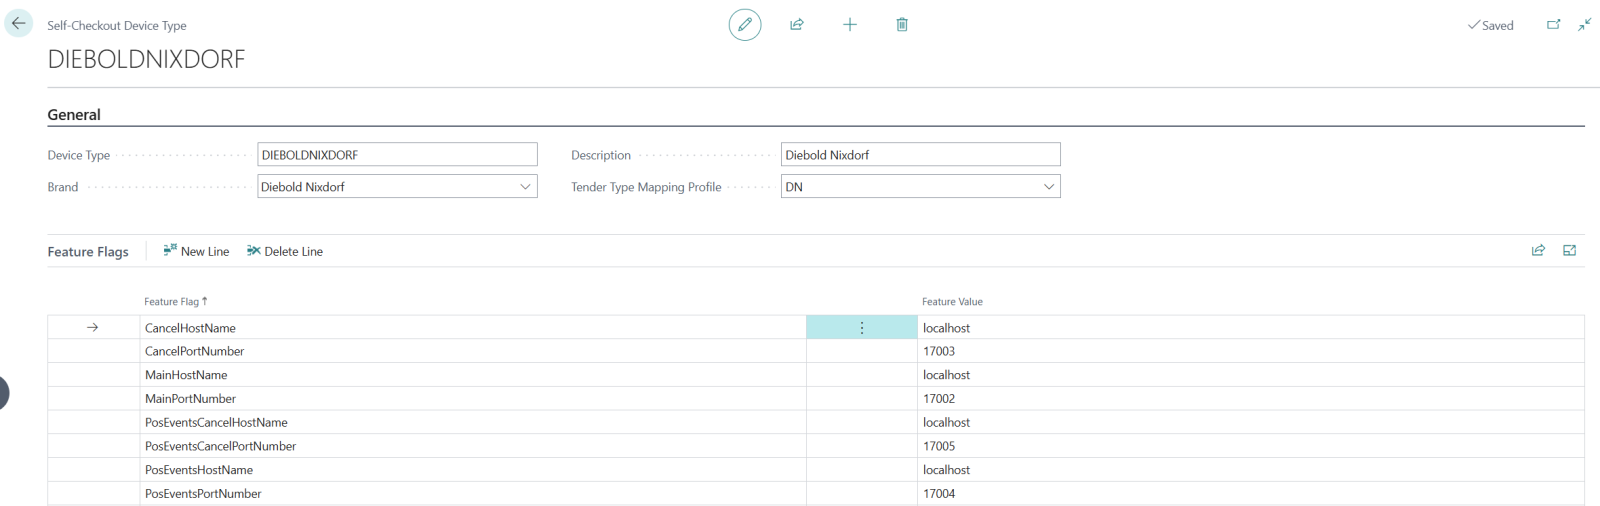
Step 2: Verify Default Feature Flags
When the RapidStart package is imported and applied, a default DIEBOLDNIXDORF Device Type is created with the following Feature Flags:
- AgeVerificationLimits → 18,20,40
- CancelHostName → localhost
- CancelPortNumber → 17003
- DiscountText → Discount
- DisplayPeriodicDiscountDescription → true
- DisplayTaxInformation → false
- GrayHairAge → 50
- MainHostName → localhost
- MainPortNumber → 17002
- PosEventsCancelHostName → localhost
- PosEventsCancelPortNumber → 17005
- PosEventsHostName → localhost
- PosEventsPortNumber → 17004
- UseCustomerOwnBag → false
- WeighingUnit → kg
Partners can adjust hostnames and ports for each terminal as required. For 1–N installations, create multiple Device Types, one per Diebold terminal.
Required Feature Flags (Communication Endpoints)
SCO communicates with the Diebold TPiSCAN self-checkout application using
socket-based channels provided by the
IfcIScanConnectorNoOut class.
Each Feature Flag defines a hostname and port used for a specific method group.
| Feature Flag | Description | Corresponds to Diebold Parameter |
|---|---|---|
| MainHostName | Hostname or IP for the main method group. | hostNameMain
|
| MainPortNumber | Port for the main method group. | portNrMain
|
| CancelHostName | Hostname or IP used for cancel operations. | hostNameCancel
|
| CancelPortNumber | Port for cancel operations. | portNrCancel
|
| PosEventsHostName | Hostname or IP for POS event notifications. | hostNamePosEvents
|
| PosEventsPortNumber | Port for POS event notifications. | portNrPosEvents
|
| PosEventsCancelHostName | Hostname or IP for cancel-related event notifications. | hostNameCancelPosEvents
|
| PosEventsCancelPortNumber | Port for cancel-related event notifications. | portNrCancelPosEvents
|
How the Diebold Integration Works
- SCO reads the Feature Flags configured for the Diebold Device Type.
- The
IfcIScanConnectorNoOutclass initializes socket channels using the configured hostnames and ports. - Dedicated receivers are started for inbound method groups (Main and Cancel).
- Event streams (PosEvents and CancelPosEvents) are handled by separate channel senders.
- Once all sockets are initialized, SCO and Diebold POS exchange commands and events in real time.
After configuring the Feature Flags and restarting SCO, the system should automatically establish a connection with the Diebold POS.
Step 3: Configure the SCO Card
1. Open the Self-Checkout Connector card in Business Central.
2. Configure these fields:
- Store ID – The store where the Diebold device(s) are located.
- Hardware Profile – Required; defines EFT and printer devices.
- Staff ID – Staff with Self-Checkout User = Yes.
- Terminals Table – Add the terminal(s) that this SCO instance will communicate with:
- 1–1 installation: Only 1 terminal, must reference a Diebold Device Type.
- 1–N installation: Multiple terminals allowed, each assigned a Diebold Device Type.
Step 4: Verify Hardware Profiles
Ensure each terminal’s Hardware Profile points to the correct EFT and printer devices in Hardware Station. If the terminal does not have its own Hardware Profile, it inherits the SCO card’s Hardware Profile.
Step 5: Testing Diebold Terminals
- Start the SCO connector from the SCO Management Portal.
- Check that the terminal(s) are Connected and Online.
- Perform a test transaction to verify communication with LS Central.
Notes
- All terminals associated with a single SCO instance must be Diebold devices.
- 1–N installations require multiple Device Types and terminals, all Diebold.
- Feature Flags are maintained in the Device Type, not the SCO card.
- Ensure hostnames and ports are correctly configured for each terminal.
See Also
- SCO Connector Home – Overview of the Self-Checkout Connector and its architecture.
- Feature Flags for SCO Connector – Learn about configurable feature flags for devices and the connector.
- SCO Connector Card Configuration – Steps to configure and manage the SCO BC card in LS Central.
- SCO Service Administration Portal – Monitoring and managing the SCO service.
- Custom Configuration – Reference for implementing custom settings for SCO devices.
- NCR Device Configuration – Configuration guidance for NCR SCO devices.