The Pharmacies system can be set up using configuration packages and administration tasks.
To process a prescription for demo or testing
- Set up the system using configuration packages and administration tasks.
- Create a paper prescription.
Optional: Convert the paper prescription to e-prescription using the Upload action in the Prescription Order page. - Confirm and pick the prescription.
- Open Final Control, approve the prescription, and take to POS for payment.
- Pay on the POS.
- Post from the Role Center.
To create a paper prescription
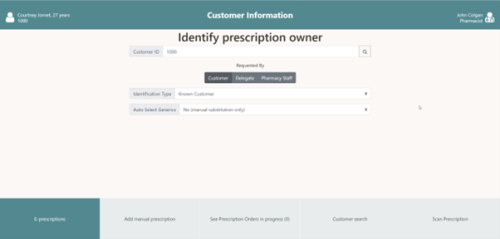
- Open the POS, and login as user 1501.
- Start the prescription process from the POS, and find customer 1000. Select Know customer option as identification.
- Press Add manual prescription – Paper.
- Register the following information on the prescription:
- Issuer 1010
- Issued Pharmacy Item no. 706300
- Dose Text 1x1 (shortcut for 1 tablet daily).
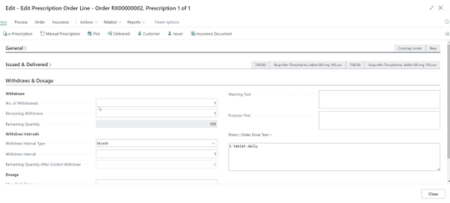
-
Close the prescription page and the order overview page that follows.
Prescription details
Here the pharmacist or employee reviews that everything is in order, confirms the prescription and picks the items (usually by scanning the packs). Optionally, the pharmacist can do a substitution.
- Confirm the prescription. This reserves inventory and locks the line.
- Pick the line by pressing the Barcode control button, and type in the item number (706300).
- Press Final Control.
Final Control
Here a pharmacist needs to approve what is being handed out to the customer. This is usually done by approving the prescription and the order.
- Press Approve. This approves the line.
- Press To POS to pay for the prescription order. This approves the whole order and sends to the POS.
- In the POS, take a payment like normally.
Posting
The prescription is usually posted from a scheduler job when it has been paid. Manual posting can be done from the pharmacy role center.