Label Setup
In this article
The first step in Label Setup is to register a new Module in the Retail Modules page and run Codeunit 10000746. Search for Retail Modules.
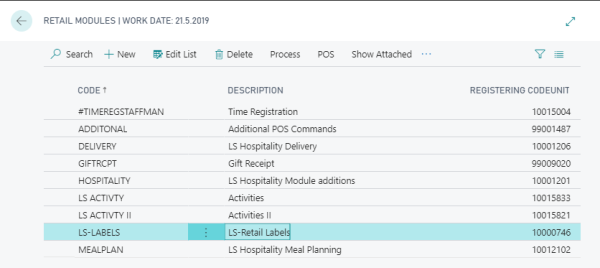
- Registering this module will create two types of Labels:
- One Shelf label “Continuous label 38x70 mm”
- One Item label “Adhesive label 71x120 mm”
- Both these Label types are designed to work with the Zebra Printers through EPL coding.
- EPL2 Programming Guide is available online at: https://www.zebra.com/content/dam/zebra/manuals/en-us/printer/epl2-pm-en.pdf
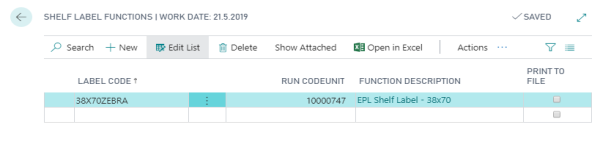
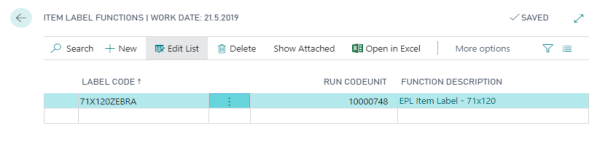
- Labels are now printed using Codeunits. Pre-designed Labels are designed in Codeunits 10000747 and 10000748.
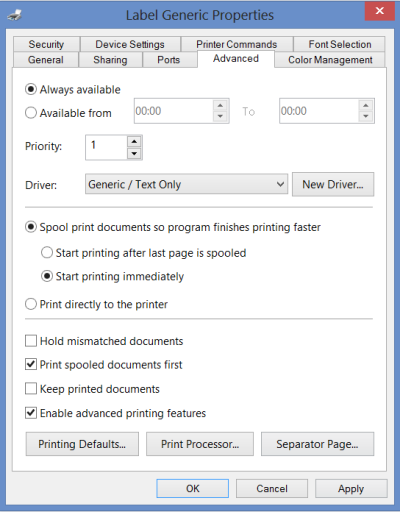
Printer selection
A printer for EPL labels must be created using a Generic Text driver.
-
Add a printer in Windows:
-
Printer selection is done for each individual Label, for each user that should be able to print the selected label. Similar to Printer selection for Reports. Open the Shelf Label Functions page, and click the Printer Selection action.
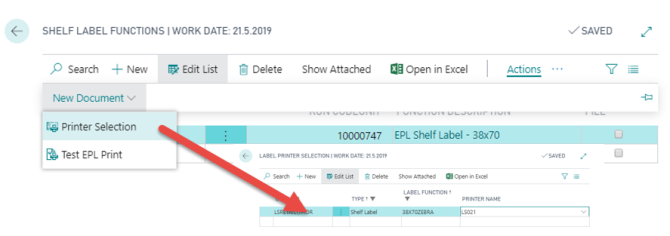
- On the Shelf Label Functions page it is also possible to test if the printer is connected, set up, and ready to print by clicking the Test Print button once the setup is done.
-
Using Codeunits for label printing makes it easier to customize your own Codeunits to print labels. Whether it is to call a Report, print directly to Zebra printer, or send information through XML or Web service to electronic labels, web stores and so on.
-
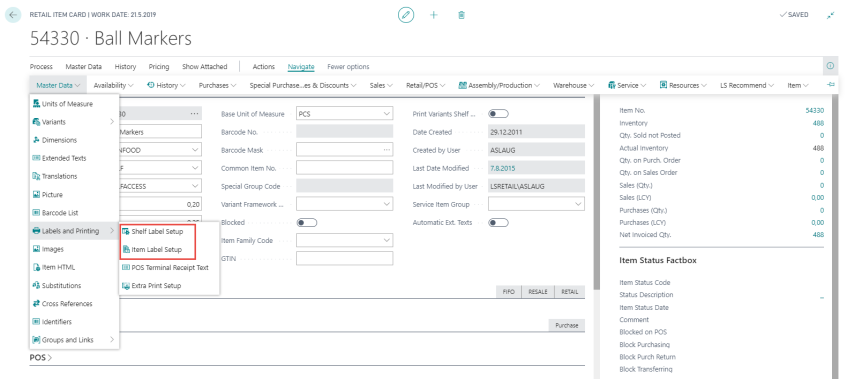
Label Functions are assigned to the item and can be store-specific:
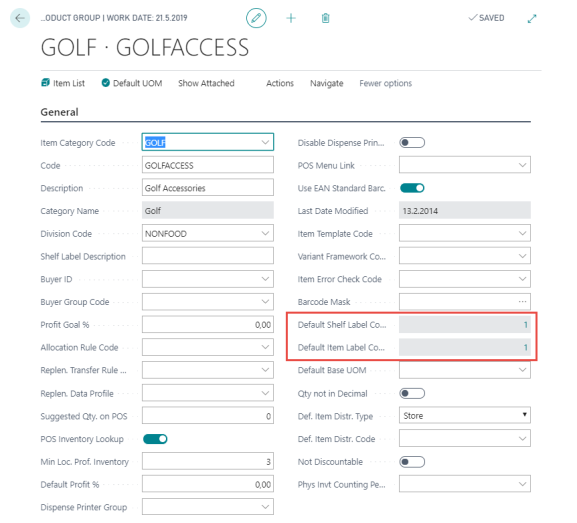
You can assign default shelf and item labels to a Retail Product Group, which will be the default for the item when the retail product group is assigned to it:
There are two Label parameters on the Store Card. Select them, if you don’t want any Label printing in the store:
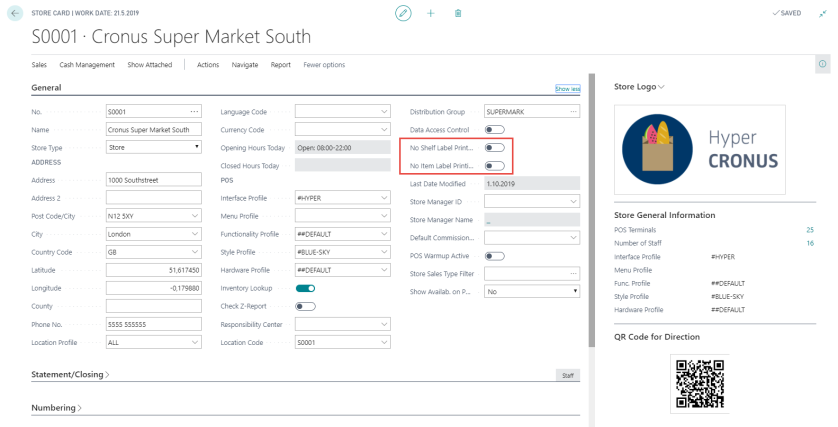
There are five Label parameters in
- Item Labels for Neg. Stock. For Item Labels the quantity printed is calculated from the stock. If the Item Labels for Neg. Stock check box is selected, one label is ordered if the stock is non-positive, otherwise no label is ordered.
- Item Labels on Price Change. If the check box is selected then Item Labels are ordered when creating needed labels using the same criteria as for Shelf Labels. Note: This is more than just the prices.
-
Delete Printed Labels. If the check box is selected then the printing history is not kept. Note: Even with the option selected, the latest printed label is never deleted as it is used for reference if new labels are needed. Also note that only one label is saved for each day so in the case of many printings on the same day the data from the last print is saved in the history.
-
Days to keep Label History.
-
Shelf Label Type.
-
Create Labels per Store
-
Create Labels per Price Group
Switching between these options will delete all outstanding and processed shelf labels so the new label type starts with a clean slate.
Create Labels per Store
-
Generates shelf label records for each store. The Store ID is included in each label record.
-
In large installations with many stores and items, this can create a large volume of records and may take significant time to process.
Create Labels per Price Group
-
Generates one shelf label record per Item No. / Price Group combination for each modified item that triggers label creation.
-
Produces far fewer records and completes processing more quickly than the per-store option.

-
-
Label actions
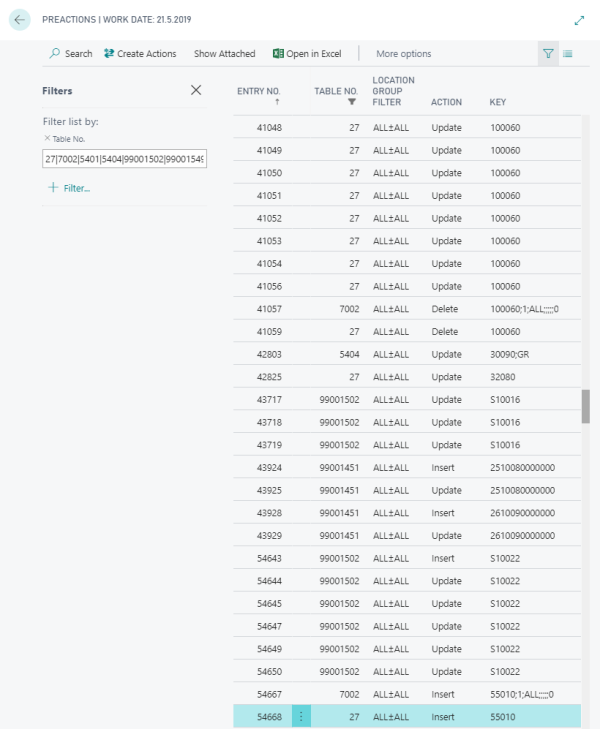
When a record is created, modified or deleted in the following tables, an action is triggered for printing labels for the current item.
| 27 | Item |
| 5401 | Item Variant |
| 5404 | Item Unit of Measure |
| 7002 | Sales Price |
| 99001451 | Barcodes |
| 99001502 | Offer |
| 99001549 | Item Label Setup |
| 99001572 | Shelf Label Setup |
Needed labels
When the forms Shelf Label Print and Item Label Print are opened, the needed labels are created for the current Store.
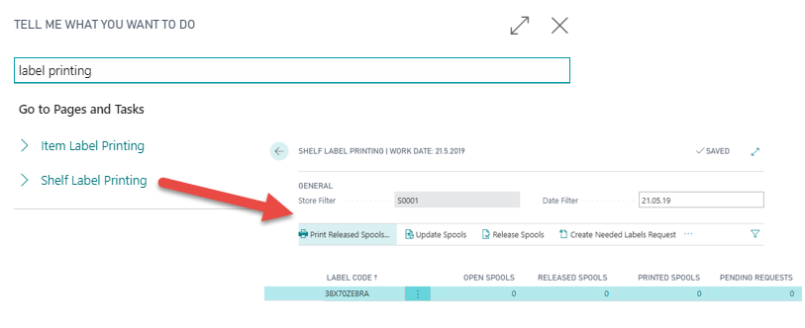
If the system is set up to replicate by pre-actions in the Scheduler Setup, the system will run through all pre-actions, otherwise all Actions for the tables listed in Needed Labels.

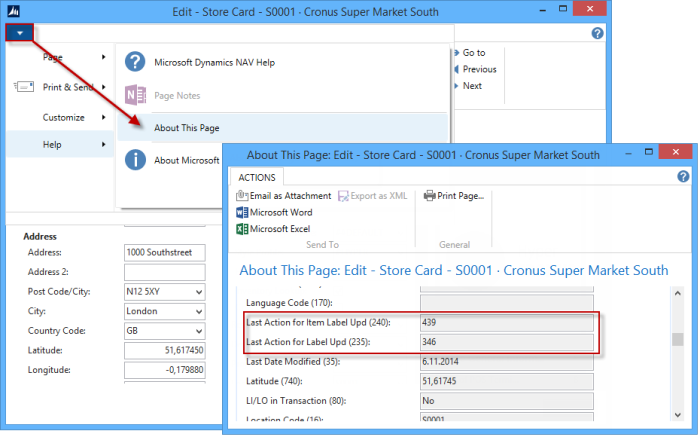
After running through the pre-actions or Actions, the system updates the Store table for the current store with the Last Action for Label update.
For the Label to be created, a few conditions must be met:
- Is the item distributed to the store?
- Does the item have label setup?
- Does the item have a valid Unit of Measure?
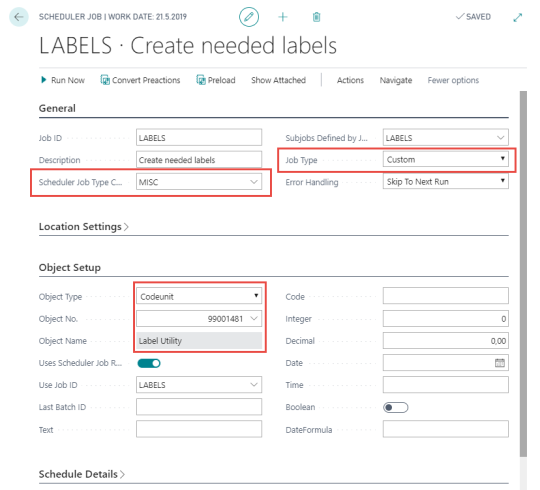
Scheduling label creation
The Label Utility codeunit can run automatically in the Scheduler to create needed labels automatically:
-
Create new jobs in the Scheduler Job page: