In this article
The LS Central Demo Data for the POS
To be able to run the POS terminal, the active LS Central user has to be set up as Retail User in the BackOffice:
- Open Business Central in a browser (path: hostname:port/service).
- Open the Retail Users page, and create a user with a POS terminal assigned.
- You can set up the Store number and/or POS Terminal number for each retail user in the Retail Users page.
- Additionally, it is possible to enable the field POS Super User for POS users to give them permission to change the look and layout of the POS.
After configuring the user and terminal, you can start the POS with the following options:
- In Back Office by typing Run POS in the search field
 in the top-right corner of the client.
 - In a browser window by typing the path http://hostname:port/service/?page=99008880.
Example: http://localhost:8080/BC150/?page=99008880). - Using the LS Central AppShell.
Note: When running the POS in a browser, it is optional to run it in full screen and kiosk mode, you can add the argument -kiosk --start fullscreen to the path:
http://hostname:port/service/?page=99008880 -kiosk --start fullscreen
The LS Central Demo Data for the POS
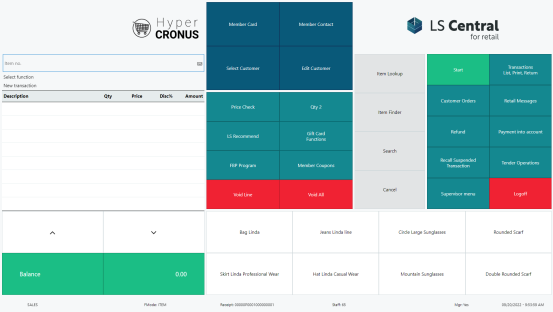
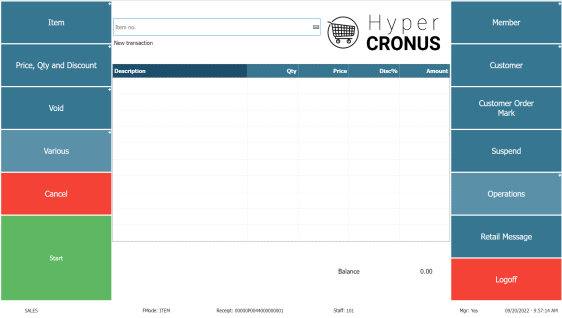
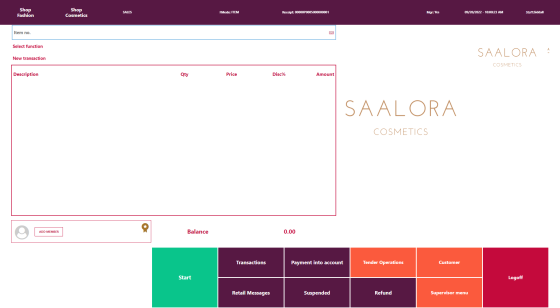
In the LS Central Demo Data there are a few Stores, Terminals and Staff IDs that are set up with profiles for different look and functionality.
Examples:
| No. | Settings | POS |
|---|---|---|
| 1. | Store S0001, P0001 and Staff ID 65 |

|
| 2. | Store S0001, P0044 and Staff ID 101 |

|
| 3. | Store S0003, P0005 and Staff ID 301 |

|
Note: Example 1 and 2 use the same POS style profile; this is the profile that determines the look of buttons, fonts, and colors in the POS.