In this article
POS Lookup functional overview
Lookup use cases and business processes
Using a different Lookup with another data table
This overview of the POS Lookup function is intended for technical or advanced users to set up and configure the Lookup, and to learn how to use it.
- POS Lookup runs in its own Panel.
- The Panel is assigned on the POS Lookup Card.
- The Lookup is assigned to a button on the POS.
The setup for the POS Lookup is done from the POS Lookup List. It is easy to modify the layout and functionality of the POS Lookup from the setup and change a field or a column, remove or add a column to a table and so on. This can be done from the POS Lookup List.
It is also easy to create a new POS Lookup based on a table that is not in the standard POS Lookup List. This feature can be valuable to developers that want to extend the functionality of LS Central.
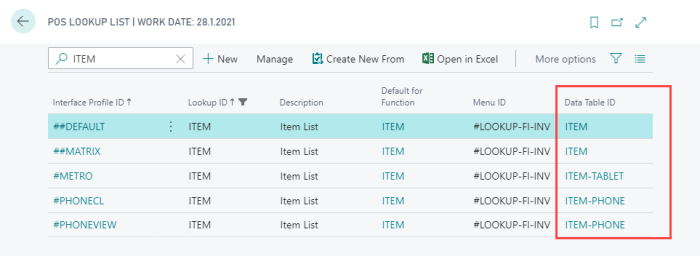
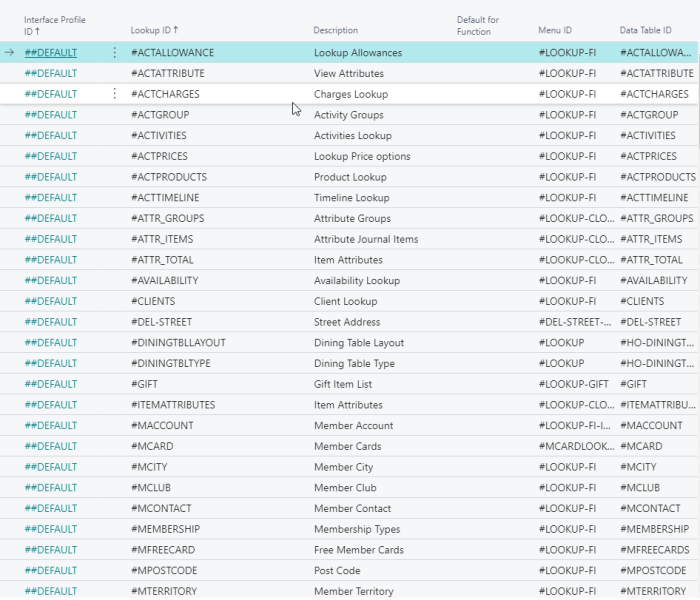
Lookup List examples:
POS Lookup functional overview
The setup for the POS Lookup can be configured from the POS Lookup List. The Demo Company released with LS Central contains the setup for the POS Lookup.
-
Go to the POS Lookup List and open a POS Lookup Card to edit, or create a new one.

In the General FastTab, all design settings for the Lookup can be accessed. Rows and columns are edited in the Data Table.
-
Click the assist button by the Data Table ID field to access the POS Data Table Card.

Here the Table Columns field in the General FastTab indicates how many columns the Lookup table should have.
- To configure which columns to show and in what order, edit the fields in the POS Data Table Columns FastTab. In this list, you connect fields from a table to columns in the grid. Settings, such as caption alignment, formatting, filtering, sorting, and so on are configured for each column. If a key is selected for the column, it will become sortable and searchable in the Lookup.
Lookup use cases and business processes
A Default Search Type can be configured in the POS Data Table Card. The available options are: Beginning of field, Any Part of field, and Whole field.
To create a new Lookup
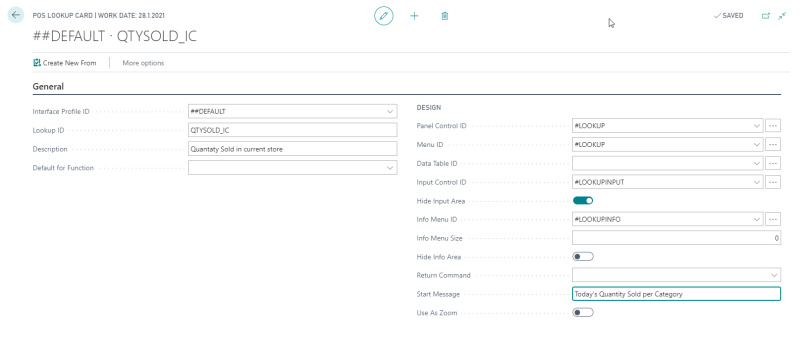
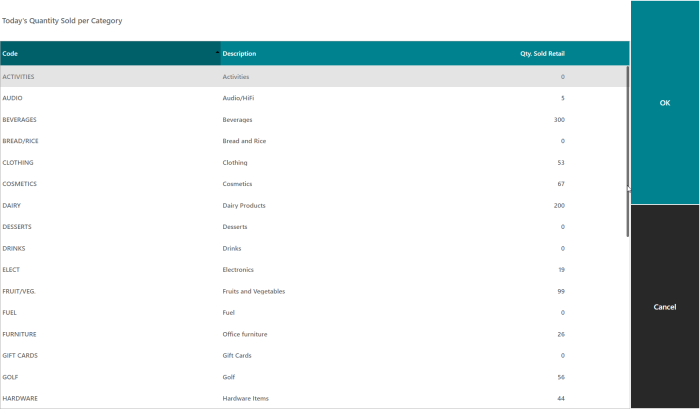
In this use case you create a new Informational POS Lookup. This Lookup should show quantity sold per Item Category in the current store for the current day.
- In BackOffice, open the POS Lookup List, and create a new Lookup.
- In the Interface Profile ID field, select the interface profile the new lookup belongs to, normally ##DEFAULT is used.
- Enter a Lookup ID: QTYSOLD_IC.
- Enter a description of this Lookup.
- Since this is only an informational lookup, select the Hide Input Area check box to make more area available for the information. If you leave the input area visible, you could search or filter the Item Category Codes, but that is the case in this example.
- Add a Start Message that will show up at the top of the Lookup when it opens. Here the message is Today’s Quantity Sold per Category:
- Create a new Data Table ID by clicking the drill-down arrow in the field, and select New.
- In the General FastTab do the following:
- Enter QTYSOLD_IC in the Data Table ID field.
- Enter a Description of your choice, for example Quantity Sold.
- Enter table 5722 (Item Category) in the Table No. field.
- Leave the Selection Mode as NoSelect.
- Set Table Columns to 3,
- Set Table Rows to 16.
- Select Field 1 as the Key Value Field.
- Go to the POS Data Table Columns FastTab and add lines:
- For Column No. 1, enter Field No. 1 (Code). Set the Caption Alignment to Left, and Key No. to 1 . Set the Preferred Width % to 40.
- For Column No. 2, enter Field No. 3 (Description). Set the Caption Alignment to Left, and the Preferred Width % to 40.
- For Column No. 3, enter Field No. 10000727 (Qty. Sold Retail). Set the Caption Alignment to Right, Formatting to Quantity, and the Preferred Width % to 20.
- For Column No. 4, enter Field No. 10000726 (Store Filter), and in Fixed Filter enter [STORE].
- For Column No. 5, enter Field No.10000700 (Date Filter), and in Fixed Filter enter [TODAY].
- Make sure that the table and lookup are saved.

Note: Since only 3 columns are put into Table Columns, the POS will only show the first three, the other ones, columns 4 and 5, will be hidden from the user; these are intended for filtering purposes.
- Next step is to use this new setup in the POS and add the new lookup there.
- Start the POS.
- To add the Lookup and add a button called Sales per Category.
- The command is LOOKUP for this button.
- Set the Parameter field as QTYSOLD_IC.
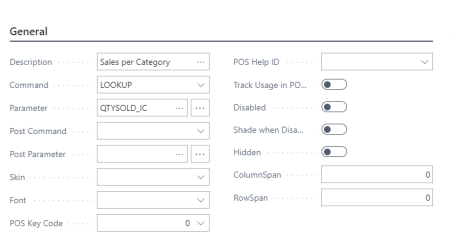
Now use the button the system displays for the requested information:
Tip: If you find that the Qty. Sold Retail column is displayed too far to the right, you can fix that easily. For the Data Table, change the Table Columns to 4, and for the column number for put in one empty space for the Column Caption. Then adjust the Preferred Width of your four columns
Using a different Lookup with another data table
IYou can create more Lookups by copying an existing lookup to a new one for another interface Profile.
An example of this in the demo data is the lookup ITEM which has a different data table for lookups for some other interface profiles.
Using this method, it is possible, for example, to view data with different number or lines (records) or different columns, fewer columns, or in another sequence.