There are two methods available to print a store logo on receipts: Download or EPSON Flash.
- Open the POS Printer List, select the printer you are using, and open the POS Printer Card.
-
Expand the Logo FastTab, to see the available options for the Logo settings:
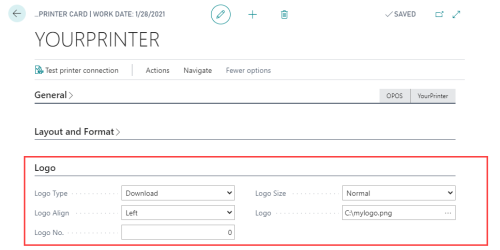
- In the Logo Type field, select either Download or EPSON Flash.
- Download - logos are acquired and printed from a local hard disk drive path.
- EPSON Flash - logos are acquired and printed from the printer memory. This feature is not necessarily unique to EPSON Printers. If the printer features a flashing utility, this feature might work for that printer.
Of these two methods, EPSON Flash provides faster printing. In both cases data size of the logo is a major factor for print speed.
Other fields:
- Logo: If you are using the Download option in the Logo Type field, this is where the download path on the local HDD is specified.
- Logo Align: This field is used to control the logo alignment on the printed receipt.
- Logo No.: This field is used to control from what section in the memory a logo is acquired (as printers can have multiple files in memory).
Note: If there is a problem printing the receipt logo, it can be because the printer does not support printing the format the image is in. Most printers will support two-color (black and white), uncompressed Windows bitmaps (files with a .bmp ending).
In some cases, when the printer does not support the supplied image format, the POS throws an error "Attempted to divide by zero" when printing a receipt.
Note: For your terminal to use this POS Printer setup, make sure that you connect it with the Hardware Profile in use. You select the printer on the Hardware Profile card, the POS Printers FastTab.
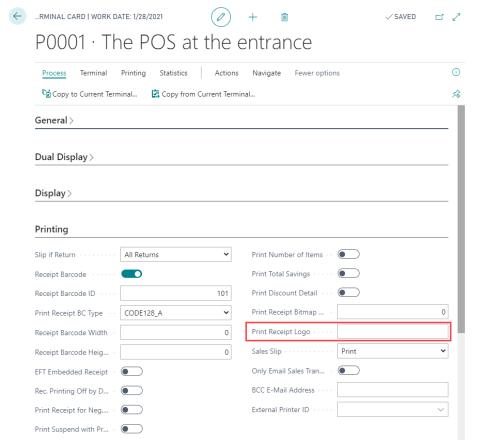
You can also set a specific logo on each POS Terminal:
-
Open the POS Terminal Card, and expand the Printing FastTab: