In this article
Example of Windows printer setup
- To set up a POS Printer, click the
 icon, enter POS Printer List, and select the relevant link.
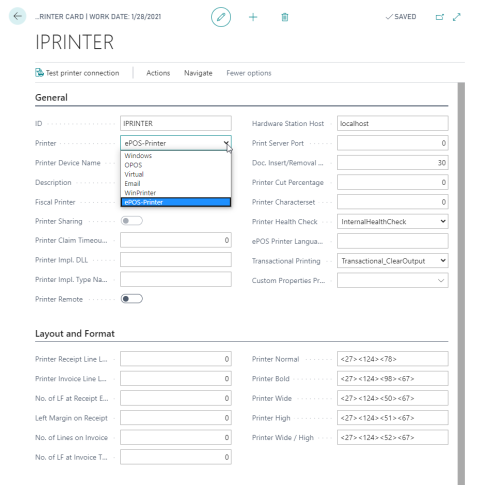
The POS Printer Card
The printer type and device name is selected in the Printer FastTab on the Hardware Profile Card.
WinPrinter
The LS Central WinPrinter prints to a Windows printer, however it will not use a Report to do it. The Print Data (Print Buffer) is sent to the POS Control (Add-in) that will print directly to the printer using Windows API.
The benefit from this is that printing to a Windows printer can now take place on the POS (client side) and will not require a Report to be run. Another benefit is when printing is needed in Web Service functions (from Mobile Devices for example), then printing will be executed without any UI Interaction.
Another benefit is that the new Window Printing Class can print directly to a Bitmap that can then be exported to a disk or accessed in memory for other use in C/AL code.
The WinPrinter uses the font fields unlike an OPOS Printer. Instead of containing ESC/POS commands in the Layout and Format FastTab, it will contain a description of the Windows font to use. The format of the font description is [NAME];[SIZE];[STYLE] where NAME can be any Windows font (for example Arial, Calibri, and so on), SIZE is the size of the font in points and STYLE can be any of the standard font styles (Normal, Bold, Italic, Strikeout, and Underline).
Other fields specific to the WinPrinter are grouped into a separate FastTab. All the measurement fields (Margins, Width, Height, and Spacing) are in millimeters.
The Debug Options field can be used to show the design text of the printout. The design text is usually a string of up to 40 characters that can accompany each printed line and will control the layout of the line. This way, a line can be split into sections with different alignment and formatting. Each section is a string of hash signs with a special control character as the second character. #L######, for example, means that a string of 8 characters should be aligned left at this position. Sections are separated by spaces. The design strings are only configurable in C/AL code in the POS Print Utility codeunit.
If the Print to File field is selected, the printout will not be sent to the printer, but instead to a Bitmap that can then be accessed or written directly to disk (if the Print Folder Path is not empty). The image quality can also be configured with the DpiX and DpiY fields (Dots per Inch).
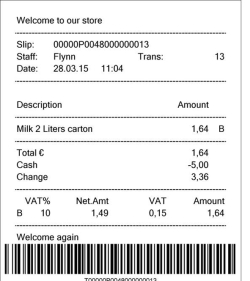
Barcode printing
The WinPrinter supports printing barcodes to a certain point. The following symbology has been tested when printing receipt barcodes, Code128 and Code39. The Code128/Code128_A is the recommended symbology to use as it seems to take up less space (width) on the printed bitmap. Note: The resolution of the Bitmap/Printer will have a say in the quality of the barcode and might cause it not to be readable by certain scanners.
Example of Windows printer setup
- Make sure your Hardware Station is running.
- Open the Hardware Station Management Portal and in Device List Create a new printer by using option Create Windows Printer. A dialog box will show a list of available Windows printers that you can select (for example PDF Creator or Snagit).
- Select the desired printer from the list and add an ID for it.
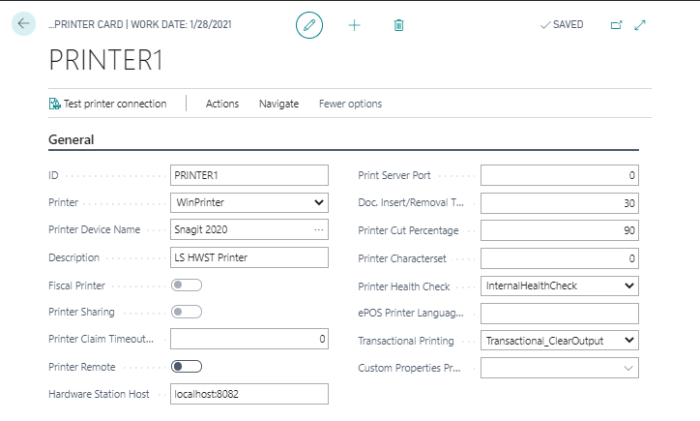
- A new Device has been created, for example PRINTER1.
- In LS Central BackOffice, open the POS Printer page, and create a new printer with ID PRINTER1. Note: Use the same ID that you created in the previous step.
- In the Printer field, select option WinPrinter since it was created as a Windows printer in the Hardware Station.
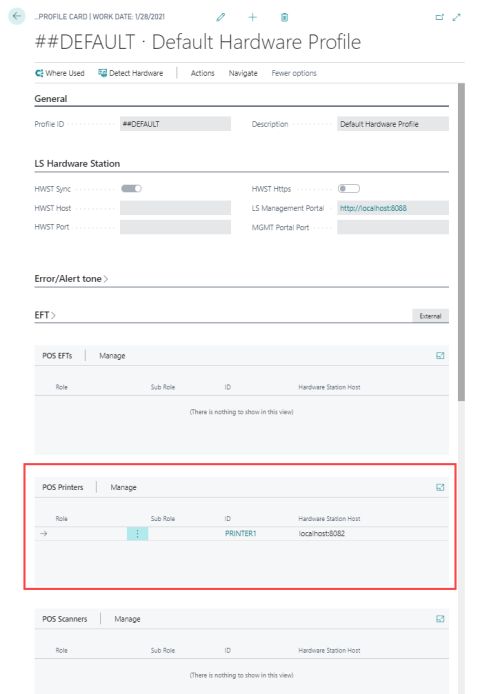
- Open the POS's Hardware Profile:
- Edit the profile.
- Make sure the HWST Sync check box on the Hardware Station FastTab is selected.
- Click the Detect Hardware action.
- Now the system populates the devices according to the Hardware Station.
- Look at the devices for your Hardware Profile: you should find PRINTER1 in the POS Printers part:
- Start your POS.
- Do one sale and finish it. The receipt should now be printed in your Snagit program.