Follow these steps to turn on IIS (Internet Information Service or Web Service) on Windows 10. The procedure is similar on other versions of Windows.
Tip: A quick Google search gives you multiple results on how to install IIS on your machine,
https://www.rootusers.com/how-to-install-iis-in-windows-server-2019/
On Windows 10
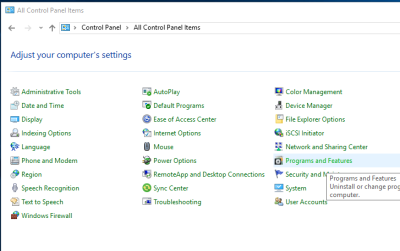
- Open the Windows Control Panel (right-click the Start button in the bottom-left corner and select Control Panel).
- Select Programs and Features:
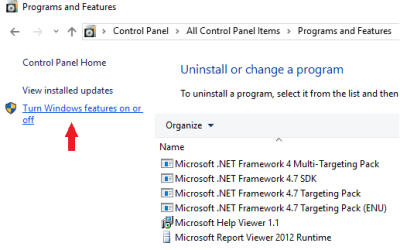
- Click Turn Windows features on or off:
- In the Windows Features, select the check boxes shown in the below image:
- NET framework 3.5 (includes .NET 2.0 and 3.0)
- Windows Communication Foundation HTTP Activation
- Internet Information Services
- Web Management Tools
- IIS Management Console
- World Wide Web Services
- Dynamic Content Compression
- Basic Authentication
- Web Management Tools
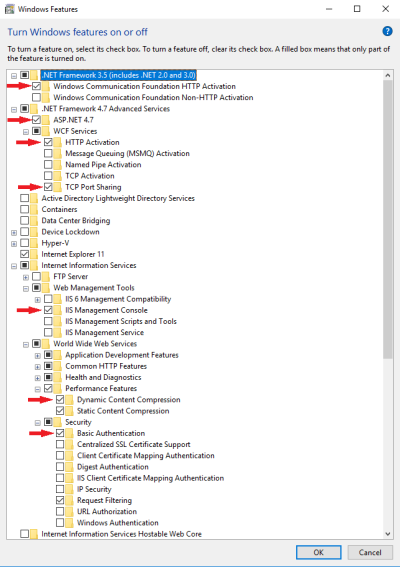
- NET framework 3.5 (includes .NET 2.0 and 3.0)
- Click OK.
If you completed step 4 successfully, you should be ready to run the CommerceServiceForLSCentral.Setup.202x.x.exe setup to create the WCF web service.
If .NET Framework 4.7 Advanced Services is not an available feature to you, you have to set up .NET Framework 4.7 (https://dotnet.microsoft.com/download/dotnet-framework/net47).
After installing the .NET framework, make sure that
- World Wide Web Services
- Application Development Features
- ASP.NET
- Application Development Features
is selected (inside Windows Features).
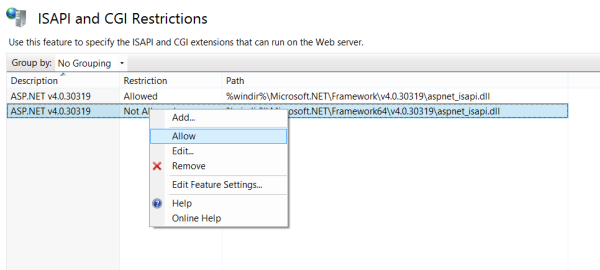
The final step is to activate and allow the newly installed .NET 4.7 framework inside IIS:
- Start by looking for and opening Internet Information Services:

- In IIS, select ISAPI and CGI Restrictions:
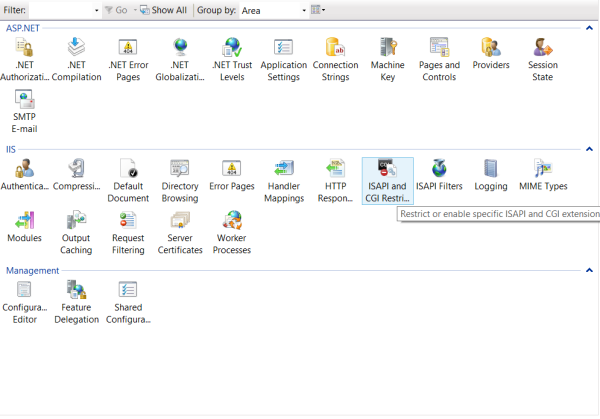
- Right-click ASP.NET v4, and click Allow:
See also