In this article
Viewing Posted Day Plan Production Orders
Producing Recipes from the Day Plan
Integrating Weekly Menu Planner with Replenishment
You can produce the recipes for your menu day plans. The program produces recipes that have the BOM Method Produce.
Producing Recipes
- Open the Weekly Menu Planner.
- Select the desired meal plan menu.
- Browse to the week in which you want to produce recipes.
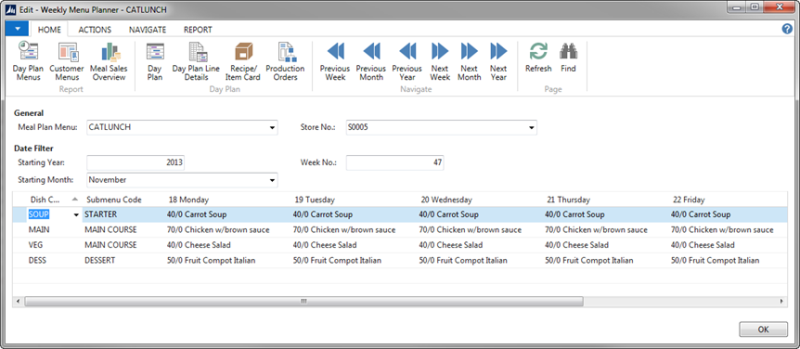
Tip: To select a day in the Weekly Menu Planner, click the drill-down arrow in one of the day fields. The fields of the day become red to indicate that this day is selected.
-
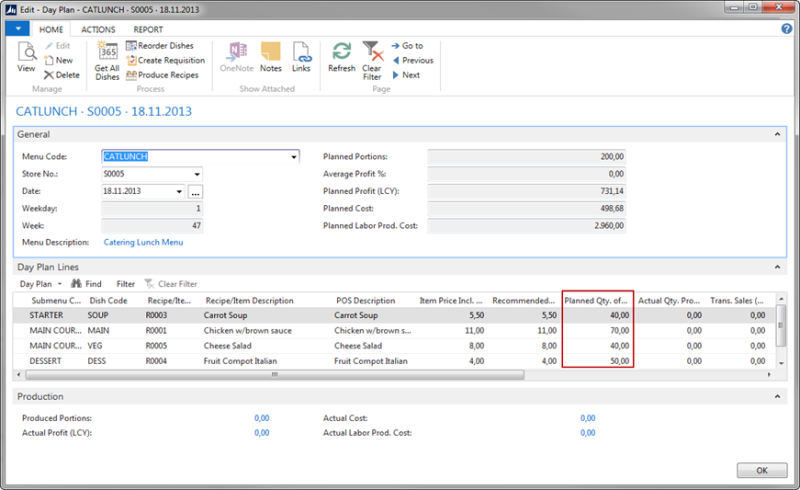
Make sure you have entered a number in the Quantity to Produce field for each day plan you want to produce recipes for (to edit the day plan, select the day, and right-click and select DrillDown or click Day Plan on the Action tab).
-
On the Action tab of the Weekly Menu Planner, click Produce Recipes (Day) to produce recipes for the selected day, or click Produce Recipes (Week) to produce recipes for the whole week. The Day Plan Production Order page appears with a line per recipe with BOM MethodProduce (also recipes that are a part of the day plan recipes):
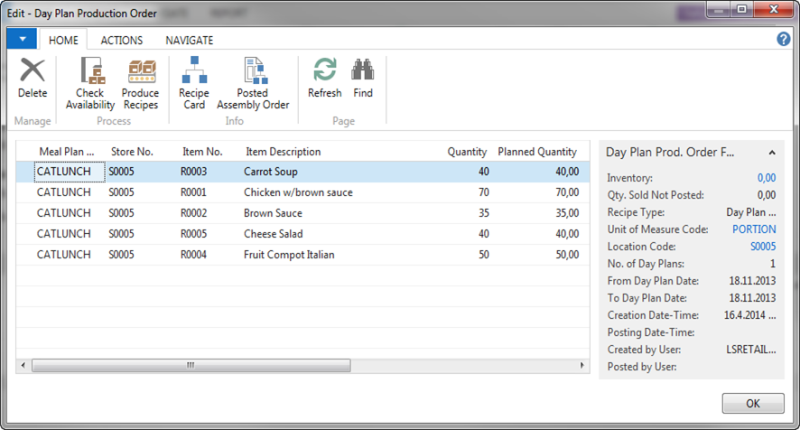
Note: The Previously Produced Qty field is only filled in for recipes on level 1.
- Adjust the Quantity field if you need to. The system suggests planned quantity of portions minus what has already been produced for the each recipe. If you adjust quantity for a recipe that has recipes as ingredients, the program updates the quantity of those recipes automatically. You can produce more quantity than planned.
- Click Check Availability on the Action tab. The system can only produce the recipes if their ingredients are available on inventory. If there are items that are not available, the system displays them for information in this page:
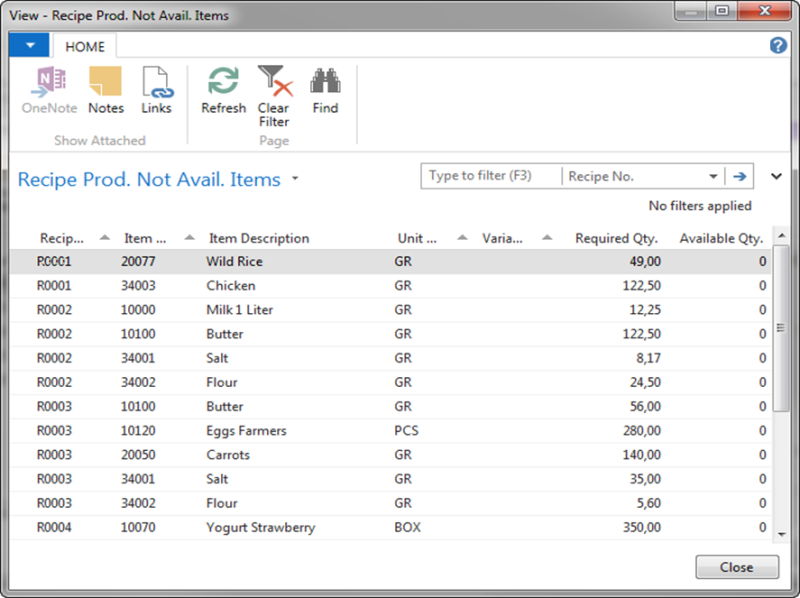
Note: If you change the Quantity after you have checked availability, you need to check availability again since the quantity has changed.
- Click Produce Recipes to produce the recipes with available ingredients.
The procedure posts assembly orders for each recipe. When the posting is completed, the Day Plan Production Order page shows for each recipe line that was posted, the number of the posted assembly order and a check mark in the Posted field.
- To view the assembly order for a line, click Posted Assembly Order on the Home action menu.

- Close the page.
The program deletes all entries in the page when you close the page. It transfers the line to the Posted Recipe Production Order table.
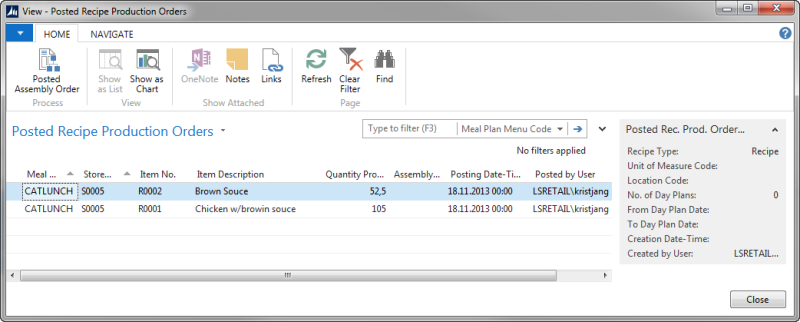
Viewing Posted Day Plan Production Orders
-
To view the day plan production orders created for a week, click Related and then click Production Orders in the Weekly Menu Planner:

List of Posted Recipe Production Orders.
Producing Recipes from the Day Plan
You can produce the recipes directly from the Day Plan Card. The program produces recipes that have the BOM MethodProduce.
- On the Weekly Menu Planner page, click the Drill-down arrow on the desired date.
- Click Day Plan on the Action tab or right-click and select Drill-down to open the Day Plan Card.
- Adjust Planned Qty. of Portions if desired.
- On the Action tab, click Produce Recipes.
- Proceed as when producing recipes from the Weekly Menu Planner.
Integrating Weekly Menu Planner with Replenishment
You can integrate the Weekly Menu Planner with Replenishment, to allow the system to capture the demand of the recipes that you have entered in the Day Plan Lines, and to propose the replenishment quantities for the ingredients required to produce the recipes.
To achieve this, you can link the Meal Plan Menu to a Replen. Planned Event, and the system will create Planned Sales Demand lines that will be processed by the Replenishment Journal, to calculate the demand of the recipes and ingredients within the specified period.
To link a Weekly Menu Planner with Replen. Planned Event:
- Click the
 icon, enter Replen. Planned Events, and select the relevant link.
 - Click the New action to create a new event, and assign it with Source Type Menu Planner.
- In the Source Code field, select the Code of the Meal Plan Menu that you want to link with the Replen. Planned Event.
There are two ways to create the Planned Sales Demand lines:
- Using the Update Lines action in the Replen. Planned Events page.
- Using the Create Planned Sales Demand Lines action in the Weekly Menu Planner.
Both actions will open the Update Planned Sales Demand from Weekly Menu Planner report.
- In the Options FastTab, fill in the Start Date and End Date, which specify the date range of the Day Plan Lines to be considered. If the report is opened using the Create Planned Sales Demand Lines action in the Weekly Menu Planner, its Start Date and End Date are defaulted to the first day and the last day of the week as specified in the Week No. field in the Weekly Menu Planner.
- Fill in the Store No. Filter, if needed. If the report is opened using the Create Planned Sales Demand Lines action in the Weekly Menu Planner, its Store No. Filter is defaulted to the Store No. that is selected in the Weekly Menu Planner.
- Select a Planned Sales Demand Type, the available options are Substitute Quantity and Additional Quantity (to Forecast).
- Select the Overwrite Allowed check box, if you want to overwrite the value of the existing overlapping Planned Sales Demand lines from another Event, which are assigned with Planned Demand Type Substitute Quantity.
- Click OK to proceed with the Planned Sales Demand lines creation.
See Replenishment Planned Sales Demand for more information about Planned Sales Demand and how it works with Replenishment calculation.