In this article
Setting Up the #DEL-ORDER Panel
To set up the restaurant selection menu

The #DEL-ORDER panel consists of 4 sub-panel areas:
- #DEL-ORDER-DETAIL - Contact Details
- #DEL-ORDER-COMMENS - Comments
- #DEL-ORDER-DATETIME - Date and Time
- #DEL-ORDER-HIST/#DEL-ORDER-LINES - Area that shows either Posted Orders (for a new order) or the lines of the current order (order lines panel).
It also consists of these menus:
- Heading at the top
- Status bar at the bottom
- Menu showing the delivery types (takeout, delivery home, etc.)
- Menu showing the payment types (cash, card, etc.)
- Menu with the restaurants you can select from
- Top menu (with the main function button, Take Order or Confirm Order)
- Bottom menu (with the Cancel function)
Setting Up the #DEL-ORDER Panel
The #DEL-ORDER panel comes with the demo data. You can rearrange its sections at will.
The only thing you must do is to set up the restaurant selection menu with the correct restaurants. In the demo data it exists in the ##DEFAULT profile only. To have a specific menu for each restaurant and call center, you need to create this menu in the menu profile specific for each restaurant/call center. For example, call center A takes orders for restaurants 1, 2, 3 and 4. You need to create the menu for call center A’s menu profile with buttons for restaurants 1, 2, 3 and 4. Each restaurant can take orders only for itself. You need to create the menu for each restaurant’s menu profile with only one button, the restaurant itself.
To set up the restaurant selection menu
-
Open the #DEL-ORDER-MENUREST menu (Point of Sale > Design > Menus):

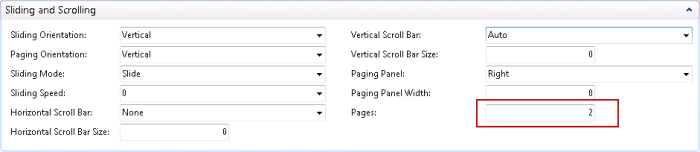
- On the Menu Attributes FastTab, enter the number of rows you want to have in the menu.
- On the Sliding and Scrolling FastTab, enter the number of Pages that are necessary. For demonstration purposes, the demo data has 5 rows and two pages, even if there are only two restaurants. It would be enough to have 2 rows and 1 page.
-
Press F5 to refresh the Preview and open the Preview tab:
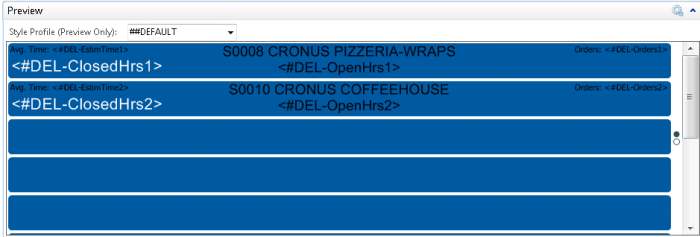
Here you see that four tags are used, to show the opening hours, closed hours, estimated time for orders and number of orders in the restaurant. The tags actually have %1 in them. You need to set up the first button only with the correct tags, then you can copy the first button to the other buttons and replace only the restaurant and the main description. The program replaces %1 with the appropriate number when you open the #DEL-ORDER panel up.
- Delete the existing lines.
- On a new line, enter 1 in the Key No. field.
- In the Command field, select the DEL-TAKEORDSELREST.
- In the Parameter field, click the drill-down arrow.
- Select the restaurant you want to have first on the list.
- In the Description field, edit the description as you want it to appear.
- Click the drill-down arrow to see the POS Tag List:
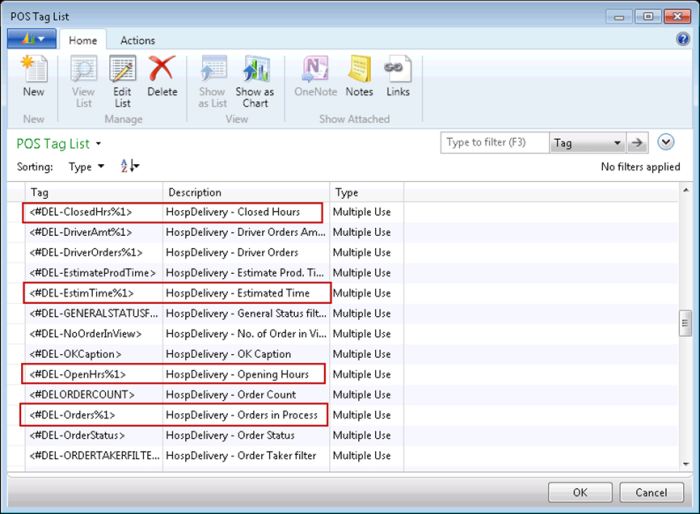
The available tags for this menu are marked with a red box.
- Select the #DEL-OpenHrs%1 tag.
- Enter \ between the tag and the description to have the opening hours appear under the description.
- In the Description field, click the Assist Button to see the Properties for the menu line.
- Open the Glyphs FastTab and arrange the text of the glyphs as the following picture shows:

Now when you have created one button, you need to copy the button to the other buttons. Then you only need to change the Parameter and the description of the rest of the buttons.
- On the Preview tab, right-click the first button you created and select Copy.
- For each button in the Preview, click Paste.
- For the rest of the buttons, delete the contents of the Description field.
- In the Parameter field, select the restaurant in question.
- Edit the Description field as you want it to appear.
- Add the #DEL-OpenHrs%1 tag to the description.
See also
Delivery Type and Payment Method Pop-up