In this article
Publish and subscribe to web services
The POS Sales data is sent to the Cloud Master database using web services.
The following needs to be set up for the POS Sales to be replicated automatically to the Cloud Master database.
Note: This setup should be done prior that the POS starts selling
In POS Database do the following:
Web service setup
This information should be replicated from POS Master database, and you should not need to update it manually on the POS.
Nevertheless, you can check if it matches the following:
- Navigate to the Web Service Setup page in LS Central.
- In the General FastTab:
- Web Service is Active check box should be turned on.
- In the Server FastTab:
- SSL switch should be enabled.
- SaaS switch should be enabled.
- Server Computer Name: The name should be api.businesscentral.dynamics.com. It will be used in the Web Service and Base url below.
- Version:v2.0
- Company Name: Name of the company you are replicating from in LS Central SaaS. This should be the company you see when clicking the cogwheel icon and going to My Settings.
Example: My Company - Tenant: Your tenantID. This is visible in the address bar of your browser and was also visible in the App registration overview.
Example: 696b709f-51ad-407e-83cd-e76c6e84843b - Web Service URI: Generated automatically by the system from the parameters you have inserted.
Example: https://api.businesscentral.dynamics.com/v2.0/696b709f-51ad-407e-83cd-e76c6e84843b/Production/WS/My%20Company/Codeunit/RetailWebServices?Tenant=696b709f-51ad-407e-83cd-e76c6e84843b - Base URL: Generated automatically by the system from the parameters you have inserted.
Example: https://api.businesscentral.dynamics.com/v2.0/696b709f-51ad-407e-83cd-e76c6e84843b/Production/WS/My%20Company?Tenant=696b709f-51ad-407e-83cd-e76c6e84843b - Environment Name: This is the name of your LS Central SaaS environment. You can always see your environment name on the right, in the black bar in LS Central SaaS.
In this example the name Production is used.
- In the Logs FastTab, you can turn on logging for the web service, if you wish. This can help troubleshoot any errors that may occur in the web services.
- In the Client Credentials FastTab, fill in these fields:
- Override Client Credentials switch should be enabled.
- Http Authentication type:S2S.
- Client ID: The Application (Client) ID that you saved earlier.
Example: 3bc124d5-98f2-4437-8834-2d9172e4b802 Client Secret: Value from the Client secret you created and saved in the App registration.
Example: C_Y8Q~a9vUuKcrcQh9Zui3jdCUO_MacFMP_JOb12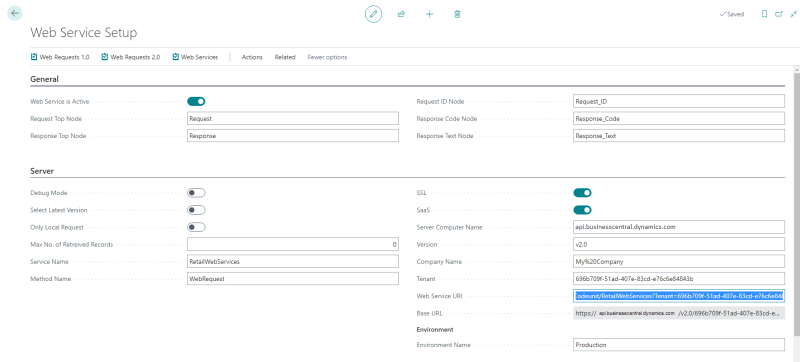

Publish and subscribe to web services
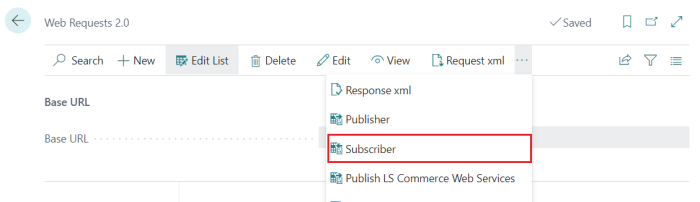
- Navigate to the Web Requests 2.0 page in LS Central.
- Check that the Base URL matches the one you have set up in the Web Service Setup page (here it ends with tenant ID).
-
Click the Subscriber action. This will create a subscription to all web services on HO in SaaS.
-
You can now go back to the web service setup, and test the connection you just created by clicking Actions in the top menu and selecting Function - Test Web Connection.
- This should result in a message stating that the connection was tested successfully in x.x seconds.
- If the test connection fails, you need to review the parameters in the fields above.
Distribution Location setup
-
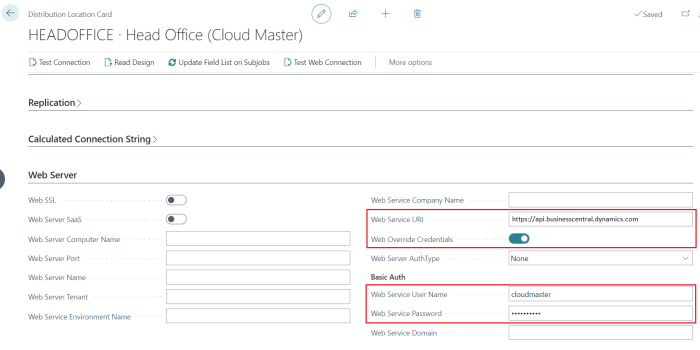
Open the Distribution Location page for "HEADOFFICE":
-
Make sure you have the correct data in the Web Server fast tab.
- Web Service URI
- Make active Web Override Credentials
- Enter correct Web Service User Name
- Enter correct Web Service Password.
-
-
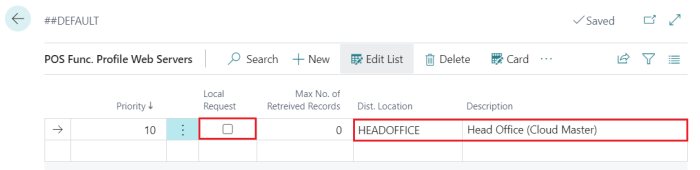
Open the active POS Functionality Profile page and select Profile > Web Servers and add the HEADOFFICE distribution location.
-
All sales created after this change should be automatically updated to the Cloud Master database.
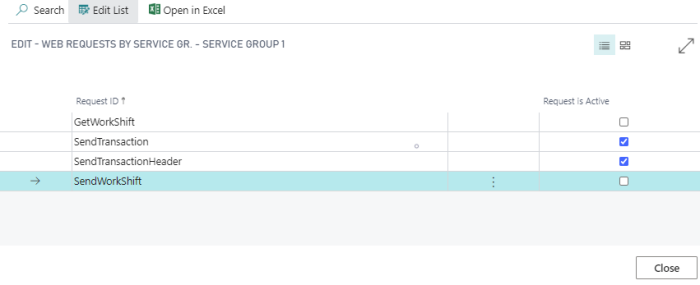
- Enable "Send Transactions".
- Add the HQ distribution location.
- Select Web Requests 1.0, and then select the SendTransaction and SendTransactionHeader web requests to activate the requests.
-
In the POS Functionality Profile page on the Web Services fast tab:
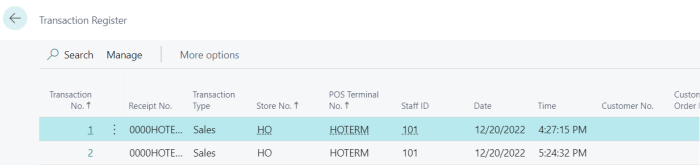
All transactions created in POS Database/databases are automatically replicated to the Cloud Master database. You can view them in the Transaction Register page.