In this article
The following steps are a quick start to get your POS Master up and running.
Open PowerShell window
- Go to your project directory (default at C:\LS Retail\Hybrid Cloud Components).
-
Click the Windows Start button -> right-click Windows PowerShell (or Windows PowerShell ISE) -> Run as administrator.
-
In the PowerShell window, change the directory to the project directory
(default is C:\LS Retail\Hybrid Cloud Components):
PS C:\> cd "C:\LS Retail\Hybrid Cloud Components"
PS C:\LS Retail\Hybrid Cloud Components>

- Open a PowerShell console, as administrator, with your project directory selected. This PowerShell window will be used in later steps to run PowerShell scripts.
Create a new License Package
- When deploying POSs on-premises, an flf file is needed to be uploaded when installing LS Central.
- Learn more about the Dual Usage Right License (DUR).
- Add your license to the Files\License directory and run:
PS C:\LS Retail\Hybrid Cloud Components> & .\NewLicensePackage.ps1 –Import
This will create a new license package from the Files\License directory and import it into your Update Service server. The package will be named your prefixlicense. You can view it on server: http://localhost:8060 under Packages.
For more information on how to update license package, see License Packages.
Update LS Central version
The LS Central and Business Central versions should match the versions of your cloud instance. However, these versions can differ as the cloud can contain patched versions that are not available on-premises.
- Open the Cloud Master tenant/Head Office.
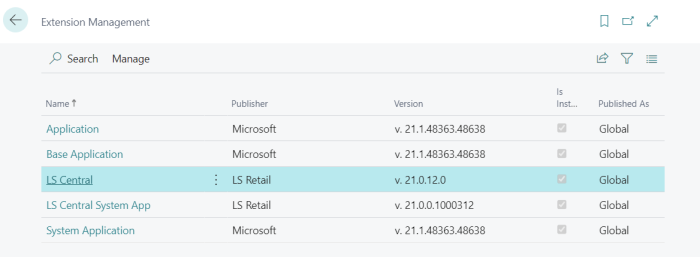
- The LS Central version can be found under Extension Management (type Extension Management in the TellMe (ALT + q) window).
-
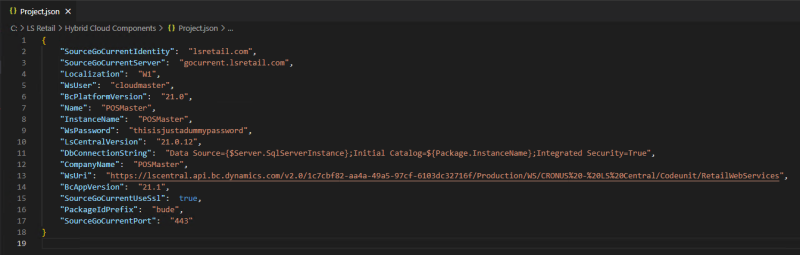
Open Project.json in VS Code (or an editor of your choice), and update LsCentralVersion properties with the same versions as your cloud instance.
-
You also need to update BCPlatformVersion and BCAppVersion to the correct versions. Both versions can be found inside LS Central Head Office on the Help and Support page.
- For the LS Central version, you should include the major, minor, and build (hotfix) version, for example "21.0.12".
- For the BC Platform and Application you should include only the major and minor version, for example "21.1", skipping the build and revision because most likely the SaaS and on-premises packages will not match.
- As an alternative, you could set the BCPlatformVersion and BCAppVersion parameters to null and Update Services will check the dependencies for the LS Central package and download the proper BC packages.
-
The Project.json file should look like this:
Download packages
To download the necessary packages to your Update Service Server:
- Run:
PS C:\LS Retail\Hybrid Cloud Components> & .\GetLsCentralPackages.ps1
This might take a while, as the packages are downloaded from LS Retail's Update Service server to yours.
When the operation has finished, you can view all the packages on the server: http://localhost:8060
New POS master and POS bundle
In the previous step, you have downloaded the packages that include the components to install on the POS Master and POSs/POS Server.
- Next, you can open the packages script to get an overview of the components.

- To select the components you want to be installed on your POS Master and POS’s /POS Server, you need a so-called bundle package. A bundle package is a collection that defines your POS Master and POS’s/POS Server a POS Bundle called NewBundlePackage.ps1.
- You need to edit the NewBundlePackage.ps1 file and make some necessary changes.
- Two bundles are configured in this script to set up POS Master and another for your POSs/POS Server.
- Note that by default, the POS bundle includes the POS Master bundle.
- Edit NewBundlePackage.ps1 and select appropriate packages.
POSMasterBundle
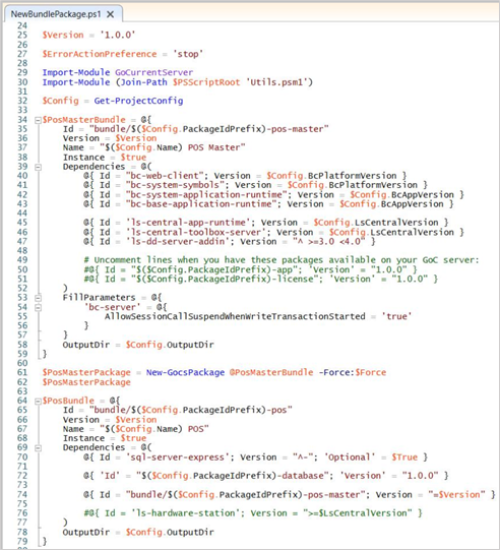
-
Find and uncomment your license package line:


Customer Extensions
- Suppose you have any customer extensions that need to be included on the POS Master and POSs/POS Server. In that case, you must create a package for the extension using NewAppPackages.ps1 and include the package in the POS Master bundle.

For more information on how to create new or update the App Package, see App Package.
POSBundle
- Note that by default, the POS bundle includes the POS Master bundle.

- We recommend that you include Hardware Station in the POSBundle to install and make the maintenance easier. To do that, you need to uncomment the Hardware Station line.
_700x37.png)
- If you want to include OPOS drivers in the POSBundle, you need to follow these guidelines on how to create a new package.
- Then you need to add the line with your OPOS package. Example:
@{ ‘id’ = ‘my-opos-package’; Version = “1.0.0”} - Now run the script:
PS C:\LS Retail\Hybrid Cloud Components> & .\NewBundlePackage.ps1 -Import
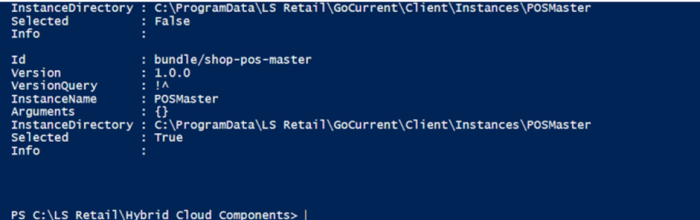
Install the POS master
- Install the POS Master by running:
PS C:\LS Retail\Hybrid Cloud Components> & .\UpdatePosMaster.ps1 - This will install the POS Master with the selected packages in NewPackageBundle.ps1.
- When the process is over, a Business Central web client shortcut is created in your start menu.
- By default, the scheduler is enabled and configured to replicate from your Head Office (cloud instance) to the POS Master.