In this article
Estimating data size in your Business Central Online tenant
User permissions after the migration (Good to know)
Important:
- You must be signed in as an administrator of the Microsoft 365 tenant and Business Central online and LS Central SaaS.
-
Make sure that at least one user has SUPER permissions in your Business Central online and LS Central SaaS.
Note: This SUPER user is the only user who can make changes in Business Central online/LS Central SaaS. All users who do not have SUPER permissions will be automatically reassigned to the intelligent cloud user group. This limits them to read-only access to data in Business Central online/LS Central SaaS.
- Any existing data in Business Central online/LS Central SaaS will be overwritten with data from your on-premises solution once the data migration process has run.
Managing database size
Microsoft recommends that you consider reducing the amount of data you migrate to less than 30 GB in each migration run.
For example, reduce the number of companies you migrate data for or delete outdated data in tables containing log entries and archived records.
Also, review how you can manage database capacity in a Business Central online environment.
Estimating data size in your Business Central Online tenant
In the online version of Business Central, data is compressed using the SQL Server data compression feature. As a consequence, the data size in your on-premises database may not match the data size when data is migrated to the Business Central service.
It is possible to estimate the compressed size of all or some tables in your database and predict the database size after moving it to SaaS.
For more information, see Estimating the data size in your Business Central online tenant.
Note:
A glitch was discovered when running this method against a database with LS Central installed. Due to a "limitation" in the sp_estimate_data_compression_savings (Transact-SQL) command, there is an issue when a field contains an ampersand (&) in the name.
To work around this issue you must change the stored procedure suggested by Microsoft, and some tables must be filtered out in the query.
-
Replace this part in the stored procedure creation script :
CopyDECLARE tables_cur cursor for
SELECT name
FROM sys.tables
-- adjust this part if you want to restrict the tables in the calculation
-- WHERE table_name in ('table name 1', 'table name 2', 'table name 3')with
CopyDECLARE tables_cur cursor for
SELECT name
FROM sys.tables
WHERE name LIKE 'CRONUS - LS Central$%'
AND name NOT LIKE '%$LSC POS Mix & Match Entry$%'
AND name NOT LIKE '%$LSC Activity Email Log$%'
AND name NOT LIKE '%$LSC Activity Status Log$%'
Below is an example for an LS Central Demo Data database. Data size is around 42 MB and after compression the size is around 29 MB, or nearly 30% of space saving.

Indexes and statistics
Update statistics and reorganize indexes on all tables in the on-premises database. This will ensure that the migration runs as fast as possible.
Define the connection pipeline between the on-premises database and LS Central SaaS.
For more information, see sp_updatestats (Transact-SQL) and Resolve index fragmentation by reorganizing or rebuilding indexes.
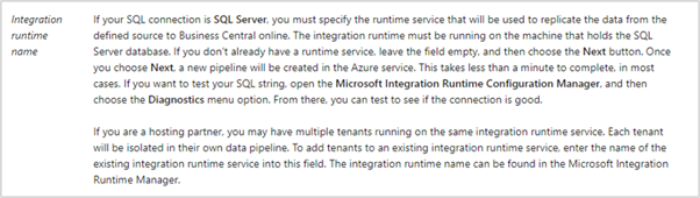
SQL connection
When migrating data from SQL, there are some details that you need to take into account:
- Version should be SQL Server 2016 or a later version.
- Database compatibility level should be 130 or higher.
- SQL Server can be on a local machine or Azure VM (on-prem), or Azure SQL.
For more information, see Create and configure a self-hosted integration runtime and The Setup Cloud Migration assisted setup guide.
SQL Server connection string
You must specify the connection string to your SQL Server, including the server's name that the SQL Server is running on and the name of the instance, the database, and the relevant user account.
For example:
- Server=MyServer\BCDEMO;Database=BC170;User Id=MySQLAccount;Password=MyPassword;
-
Server=MyServer\SQLEXPRESS;Database=BC170;User Id=MySQLAccount;Password=MyPassword;
For more information, see the SQL Server blog.
The following examples illustrate a couple of connection strings with different formats:
-
Server={Server Name\Instance Name};Initial Catalog={Database Name};User Id={SQL Authenticated UserName};Password={SQL Authenticated Password};
-
Server={Server Name\Instance Name};Database={Database Name};User Id={SQL Server Authenticated UserName};Password={SQL Server Authenticated Password};
See more examples: https://www.connectionstrings.com/sql-server/
The SQL connection string is passed to Azure Data Factory (ADF). It is encrypted and delivered to your Self-Hosted Integration Runtime and used to communicate with your SQL Server instance during the data migration process.
User permissions after the migration (Good to know)
Once the cloud migration environment is configured, all users without SUPER permissions will be automatically assigned to the Intelligent Cloud user group with the Intelligent Cloud permission set and will have read-only access.
Users that are reassigned to the Intelligent Cloud user group will have access to read ALL data by default. If you need to further restrict what data a user should read, the SUPER user may create new user groups and permissions sets and assign users accordingly.1
WHY?
If you need to keep the business running while testing, the on-premises solution is your primary application for running your business, including activities such as data entry, tax reporting, and sending invoices.
You can run the migration more than once, and the migration process will only migrate tables that have changed.
Note: The data on LS Central SaaS will be overwritten. Therefore, it is important not to do any activities or modifications of data until the migration process is finished, and you are ready to go live on LS Central SaaS.
If you need to do some tests on the SaaS environment, you can create a sandbox environment by copying the production environment.