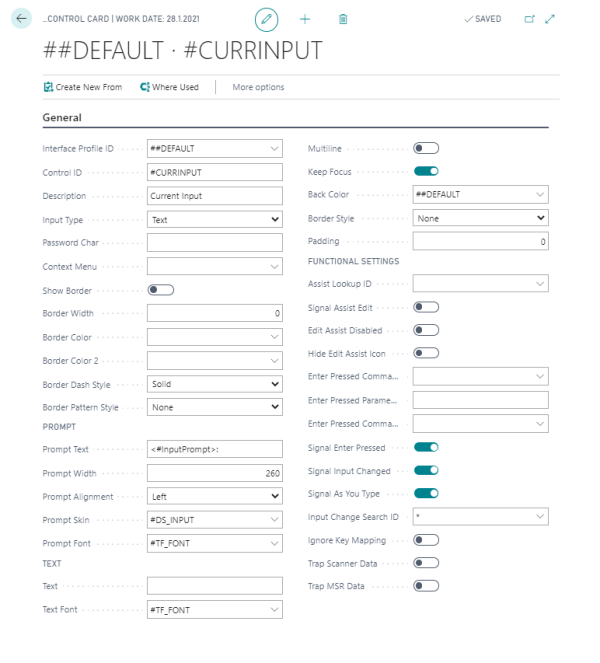
Input Controls are used for areas in the POS where the user has to enter data. These are used in several panels in the system.
- To open Input Controls, click the
 icon, enter POS Interface Profile List, and select the relevant link.
 - Locate your Interface Profile.
- Click Lists - Input Control List (or Related - Profile - Input Control List).
Tip: A quicker way is to open the POS Input Control List directly, but then for a new profile you have to enter the Interface Profile ID manually.
Note: New types of Input Controls can only be added by programming.
The #CURRINPUT control on the ##POS pane is an example of an input control. This is the main input panel where the user inserts data, for example to enter item number for sale.
Input are fixed data, or in other words, the control ID has to exist for the POS function that uses it.
Note: The #CURRINPUT should only be used on the #POS panel.
The Input Control Card
 :
:
There are several settings available for the Input Control:
- The Input Type field has a few options, for example to control whether the POS opens the numeric or alphabetic keyboard.
- The Show Border check box lets you put a border around the field Name.
- Fields in the Text section:
- Text: If you enter text here, the text is displayed in the input area for the input control in POS. Keep this field empty, if you want users to enter the text they are inserting.
- Text Font: Here you can enter a font from the Style Profile to configure how you want the entered text to look.
- For the Input control you can select colors, styles, and fonts.
Note: The color for the input area border is fixed depending on the active #DEFAULT skin.