In this article
To use the RFID as a simulator
Setting up an RFID device for the LS Central Web POS requires that you have set up the Hardware Station service and that it is running.
To set up an RFID device you must first create the device in the Management Portal, and then finish the setup in Business Central:
- Open the Management Portal in a browser. The default path is localhost:8088
- In the Devices List, click the Create RFID button, and assign an ID to the device.
- By default, the RFID Controller will be created as a Simulator.
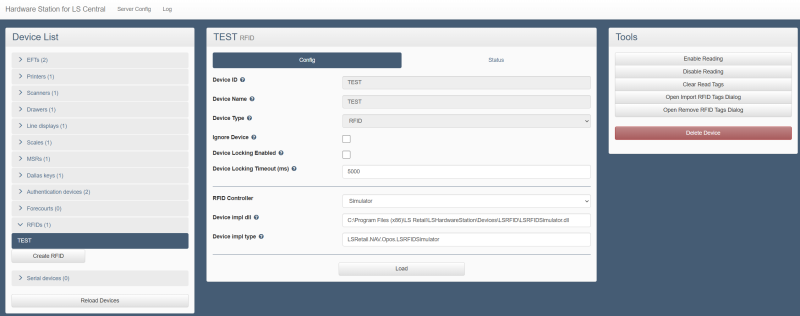
To use the RFID as a simulator
- In the Management Portal, click Open Import RFID Tags Dialog to import tags for simulation.
- Click Enable Reading to start the simulator, which cycles through the imported tags and sends them to the POS.
- Click Disable Reading to stop the simulator.
- Click Clear Read Tags to clear tags that have been sent (marked as Read).
- Click Open Remove RFID Tags Dialog to view and remove specific tags that have been sent (marked as Read).
Configuring the simulator
The simulator is randomized, allowing configuration to simulate real-world scenarios. For example, you can set it to send a maximum of 7 EPCs initially and then a maximum of 4 at an interval. This helps replicate customers adding items into the RFID basket in batches.
The simulator accepts a list of EPCs (RFID tags).
Important:
- EPCs are GS1 barcodes that include a serial number, not EAN-13 (which are used in demo data).
- GS1 barcodes can be configured in LS Central, or manually added to the item barcode list for testing.
- To create EPC values for any barcode + serial number, use the GS1 Encoder/Decoder tool.
Example
Enter EPC values (RFID tags) into the import dialog:
30628B166E3B0540069F6BC7,30628B166E3B9D40069F6BC8,3072129D39357800069F6BC9,30628B166E3C4D40069F6BCA,3075A527A200F600069F6BCB
Note: Barcode values (e.g., EAN-13) are not supported in the import dialog.
Hardware Station currently supports Nordic ID Sampo devices. These devices allow communication via:
- Wireless (Wi-Fi)
- Bluetooth
- Cable (USB-C)
- Wired (Ethernet)
To set up a real RFID device
- Download the required drivers from the Nordic ID Sampo website.
- Install the drivers on the machine running the Hardware Station.
- Connect the device to the Hardware Station using your preferred connection method (Wi-Fi, Bluetooth, USB-C, or Ethernet).
- Access the Management Portal.
- In the Devices List, click the Create RFID button, and assign an ID to the device.
- Switch the RFID Controller from Simulator to NordicIDSampo.
- Click Load to initialize the connection.
- To test the setup:
- Drop some RFID tags near the reader.
- Click Enable Reading.
- If successful, the tags should be read and sent to the POS.
See also
Installing the Hardware Station
Hardware Station Troubleshooting
How to ... in Hardware Station
How to: Configure the Custom Implementation DLL and Type