Setup
In this article
Number Series setup for Frequent Buyer Programs
Number Series setup for Frequent Buyer Programs
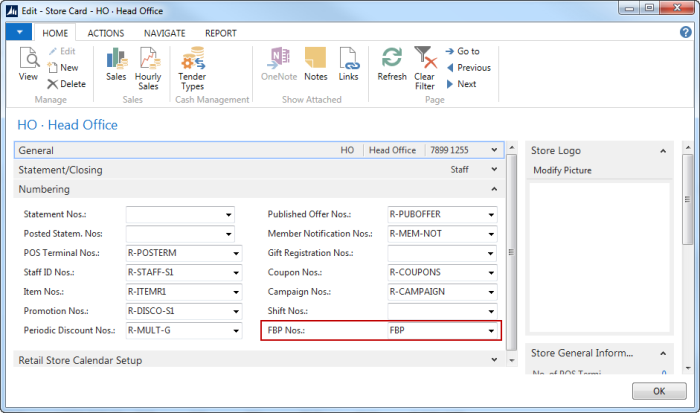
On the Store Card for Head Office, a new Number Series must be set for the Frequent Buyer Program headers.
The numbering should be set to 0001 to 9999.
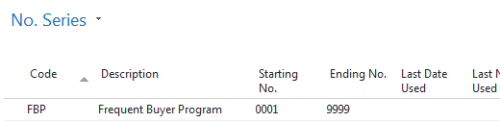
The numbers will be used as ID for Frequent Buyer Programs. The same number will also be used as Coupon Reference Number in Automatically created benefit Coupons.
Member Management Setup
In the Member Management Setup card defaults for the Automatic creation of benefit coupons are set.
On the Frequent Buyer Program FastTab:
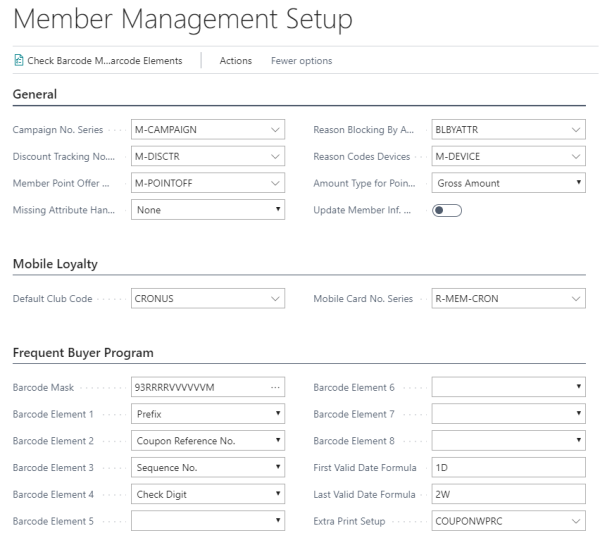
- Barcode Mask - must be created and selected for all Frequent Buyer Programs. The mask must consist of a two-digit prefix, then a four-digit Coupon Reference Number, a six-digit Sequence Number, and finally a Check Digit.
- Barcode Elements - must then be selected (1-4).
- First Valid Date Formula - can be set but is optional.
- Last Valid Date Formula - can be set but is optional.
- Extra Print Setup - code must be created and selected.
Note: Click the Check Barcode Mask against Barcode Elements action at the top of the card to check the mask against the elements.
Note: In the above example, the Barcode Mask four-digit Coupon Reference No. will be created with the FBP No. This means that you can create up to 9999 programs. For each program you can create 999999 coupons. If your business is more like many programs but fewer coupons, then you can change the number of digits for the reference and sequence numbers but the total must be 10 digits. If you change the length of the Reference number, you must change the number series for Frequent Buyer Programs in Store setup for HO accordingly.
-
Two new lines must be added to the Table Distribution Setup.
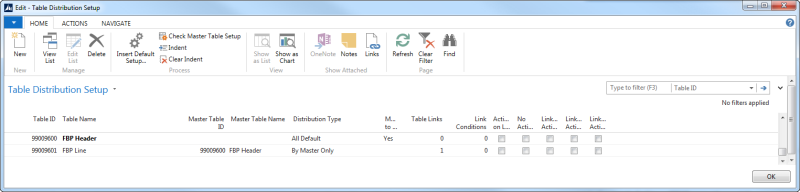
- You can add these lines automatically by running the Insert Default Data action from the Retail Setup Card (see below).
-
The following Scheduler Subjobs for action Preload can also be created by using the Insert Default Data action by checking Scheduler Subjobs (see below).

-
And finally, you can create the necessary POS Commands by selecting the POS Commands check box on the Insert Default Data page.
- Click the Insert action to run the commands.