In this article
Back Office - information on tips paid to staff
To set up Gratuity Management
Create an income account and an expense account for tips
- Click the
 icon, enter Store, and select the relevant link.
 - Select Cash & Safe Management , Income/Expense Accounts on the Action banner.
- Alternatively, click the
 icon, enter Income/Expense Accounts, and select the relevant link.
 - Create Tips In as an Income Account and Tips Out as an Expense account, both posting to the same G/L or two different G/L accounts that are correctly set up regarding VAT calculation.
- For each Income/Expense account select Gratuity Type Tips.
Add a Tips In button and a Tips Out button to a POS sales menu.
The Tips in button is a simple way of registering a tip amount that is posted to an income account. If you are using hospitality types in your restaurants, you can control how the receipt prints suggested tips or lines for the customer to write on and register the tip amount easily in a tips panel, using the TIPS_SUGGESTIONS command.
The Tips Out button is used if tips are to be paid to the staff at the store using the POS.
- Open the Sales POS and select the menu where you want to have the Tips In and Tips Out buttons.
- Add an additional row or column to the menu if necessary, depending on number of free buttons on the menu.
- Add the Tips In button with POS command INCEXP and as parameter the Tips In income account.
- Add the Tips Out button with POS command INCEXP and as parameter the Tips Out income account and with Post Command CH_STAFF_L.
Assign a Tips Report button to the Tender Operations menu
- On the Tender Operations menu, add a button for Tips Report printing with command PRINT_TIPS.
Add permissions for tips handling
- Click the icon, enter Staff Permissions Group List, and select the relevant link.
- Add permissions for TIPS Handling and/or the staff authorized to print Tips reports and post Tips Out transactions.
Entering tips at the POS
Tips can be entered as an additional line on the current sales at the POS by pressing the Tips In button. Enter the tips amount received, or in a separate sales transaction.
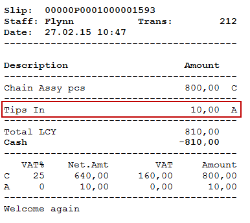
The transaction is finalized as usual and the tips amount is displayed on the POS slip.
Tips paid to the staff
The Tips Out button is used if tips are to be paid to the staff at the store using the POS.
- Press the Tips Out button and enter the amount to be paid.
- Select the staff from the staff list that is supposed to receive the payment.
If nothing is selected and Cancel is pressed, the tips-out is assigned to the operating staff ID.
Tip: It is possible to enter more than one Tips Out line in one transaction, each transaction line is assigned to different Staff ID.
Tips Report
-
In the Sales POS, press Tender Operations.
-
Press the Tips Report button.
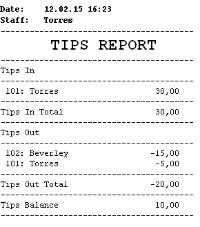
The POS prints out details showing Tips received, Tips paid out and Tips Balance since the last Z-Report printing:
The Tips out part of the Report is also printed as part of XYZ Reports:
Each Trans. Income/Expense entry for the Tips Out account is marked with the receiving staff and can be linked to the Staff for reporting purposes.
The balance of the G/L account linked to Tips In and Tips Out inc./exp. Accounts reflects the Tips amount at any given time and should normally be close to zero if the Tips is divided between members of staff at end of each day, given that all statements have been posted.
Back Office - information on tips paid to staff
To view how much each staff member has received in tips:
- Click the icon, enter Expense Account, and select the relevant link.
- Select Transaction Entries on the action tab.
- Activate the Advanced Filters option, and set the desired filtering.
-
You can transfer the result to Excel for further analysis or calculation.