Every line on an e-Invoice must carry an Item Classification Code that categorizes the product or service sold. The MY ClearTax integration reads this code from three places — the LSC Retail Item card, the Microsoft Item card, and the LSC Income/Expense Account card. If an individual item or account does not have a code set, the integration falls back to the default value configured in E-Invoice Setup.
Classification codes are maintained in the Data Catalog under the Classification data type. See E-Invoice Catalogs.
Set Item Classification Code on the Retail Item card
Perform this step for each retail item sold through the POS.
- Click the
 icon, enter Retail Items, and select the relevant link.
 - Open the relevant retail item card.
- In the Item FastTab, locate the Item Classification Code field.
- Select the appropriate code from the Classification data type in the Data Catalog.
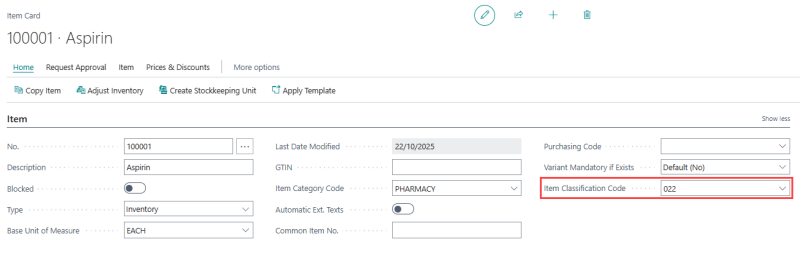
Set Item Classification Code on the Microsoft Item card
The same Item Classification Code field is also added to the standard Microsoft Item card by the integration. Set this field on items that are used in non-retail sales or where the Retail Item card is not used.
- Click the icon, enter Items, and select the relevant link.
- Open the relevant item card.
- In the Item FastTab, locate the Item Classification Code field.
- Select the appropriate code from the Classification data type in the Data Catalog.
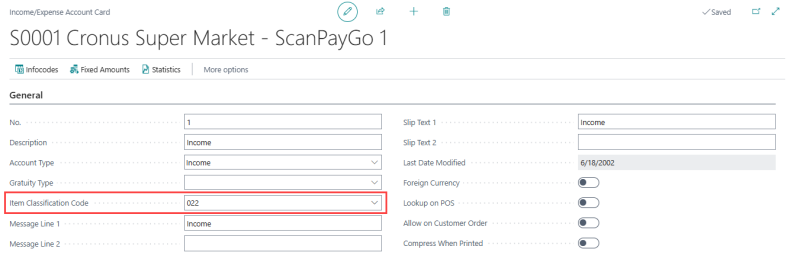
Set Item Classification Code on the Income/Expense Account card
For transactions that use LSC Income/Expense Accounts (for example, service charges or non-item lines), the integration reads the Item Classification Code from the Income/Expense Account card.
- Click the icon, enter Income/Expense Accounts, and select the relevant link.
- Open the relevant account card.
- Locate the Item Classification Code field.
- Select the appropriate code from the Classification data type in the Data Catalog.
See also