Before able to request OAuth access in LS Central, the app must first be created in the Shopify Dev Dashboard. After that, a development store needs to be created, and the app must be installed in that store to approve and establish access between the Shopify development store and LS Central.
To configure app and development store via the Shopify Developer Dashboard:
-
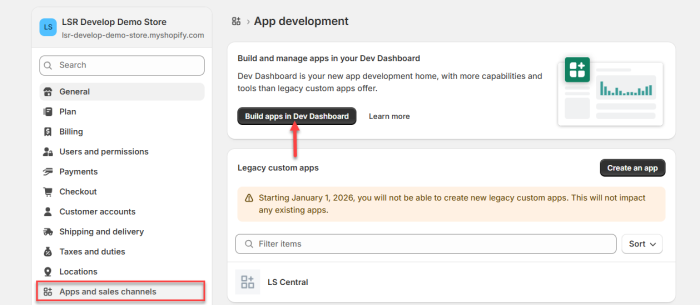
Open a Shopify store and navigate to Apps and sales channels and click Build apps in Dev Dashboard.
-
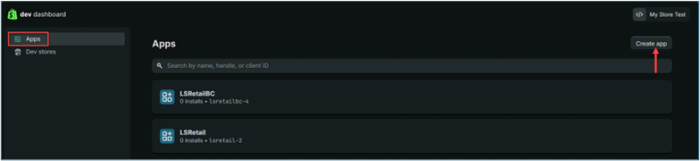
In the Shopify Dev Dashboard, click Create app to create a new development app. Enter an app name, then click Create to continue.

-
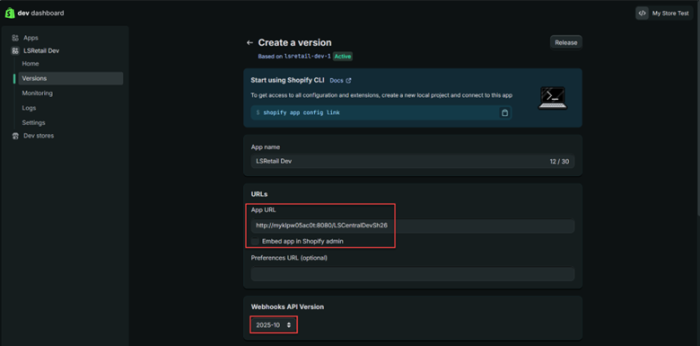
Continue configuring the app by creating a version. In the URLs section, set the Apps URL to the LS Central base URL, disable Embedded app in Shopify Admin, and select the latest Webhooks API version.
-
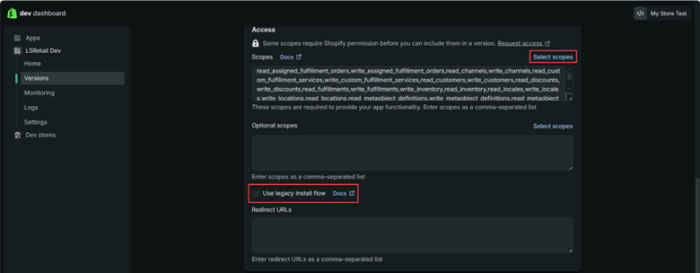
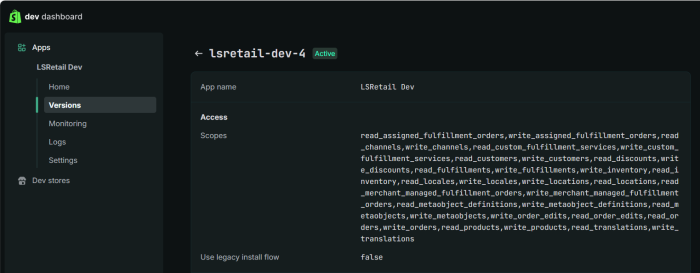
Continue configuring the app. Under Access, select all required scopes and clear Use legacy install flow. Then, click Release at the bottom to publish the app version.
-
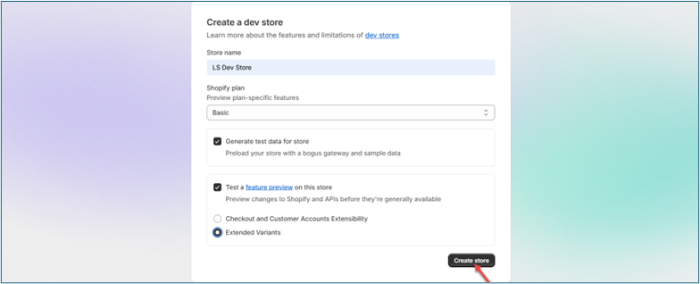
Next, create a new development store. From the left sidebar, open Dev stores and click Add dev store. Enter a store name, apply the settings shown in the second screenshot, and click Create store .

-
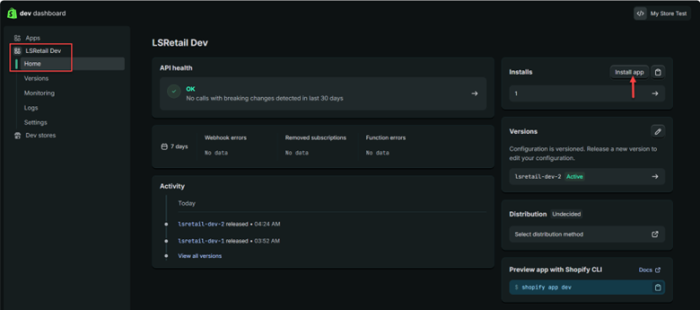
Return to the Shopify Dev Dashboard, open the created app, navigate to the Home page, and click Install app.
-
After installation, this page will be displayed. Select the correct Shopify dev store, which must have the same name as the development store created in Step 5. The linked Business Central environment will then be launched to begin the initial setup.

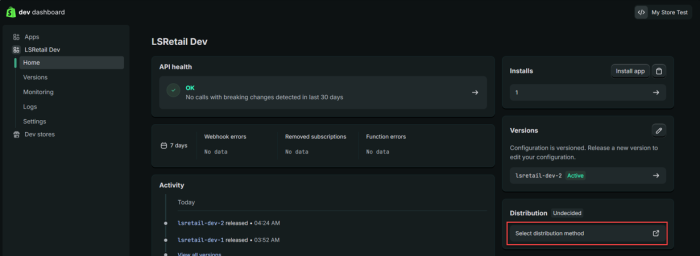
Key Steps to Prevent Order Import Issues
-
Return to the Home page and click Select distribution method in the right-side panel.
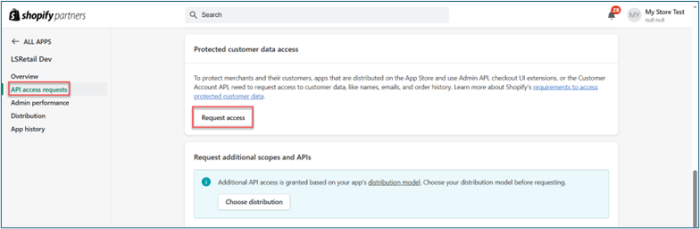
-
Next, click API Access Requests in the left-side panel, then select Request Access.
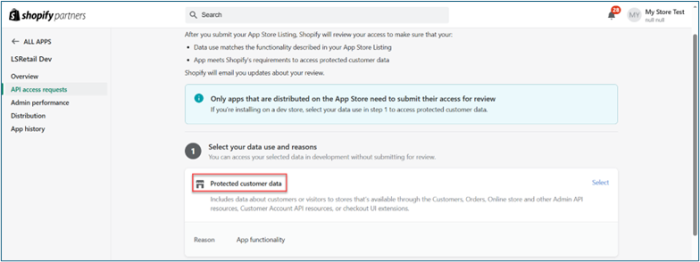
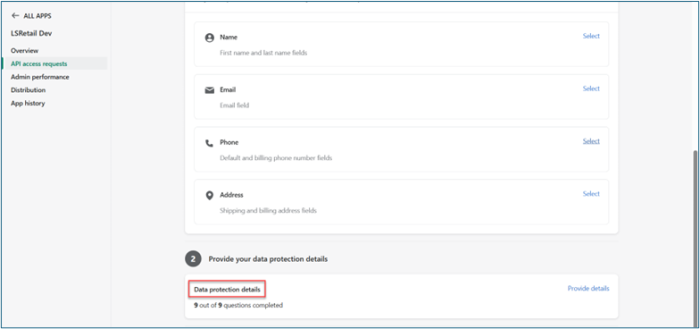
-
In the Protected customer data section, select the reason for access and choose App Functionality. Complete all required fields in the Data protection details.
-
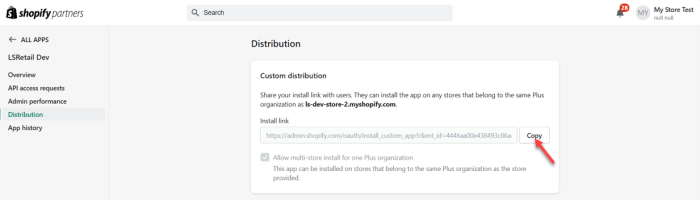
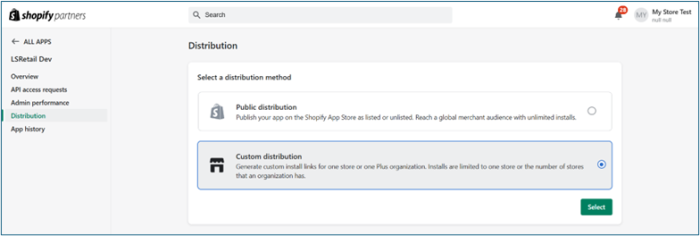
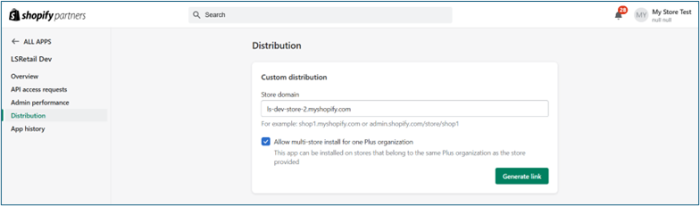
Continue configuring the distribution by selecting Custom Distribution and clicking Select. Enter the store domain, then click Generate Link.
-
Copy the generated link into the browser address bar. The link will redirect to the Shopify store. Select the correct store, which will open the linked Business Central environment. Once the correct Business Central instance appears, the configuration is complete, allowing orders to be created or testing to be performed.